In Part 1, I showcased how you can create a hero image with ZStack.
Today I will show you how to create a multi struct view and common pitfalls you may run into. In fact some of these issues exist in the current Nudge codebase.
Getting started
In order to follow along, you will need the following:
After instaling Xcode, do the following:
- Xcode -> New -> Project -> macOS -> App
- Ensure your interface is set to “SwiftUI”
Call the project DSUI4MAPT2
Initial SwiftUI code provided by Apple
In your project tree, you will see a ContentView file.
//
//  ContentView.swift
//  DSUI4MAPT2
//
//  Created by Erik Gomez on 6/14/21.
//

import SwiftUI

struct ContentView: View {
    var body: some View {
        Text("Hello, world!")
            .padding()
    }
}

struct ContentView_Previews: PreviewProvider {
    static var previews: some View {
        ContentView()
    }
}
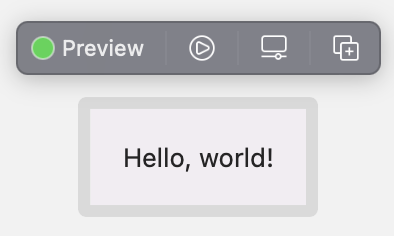
When previewing this in Xcode you should see the following
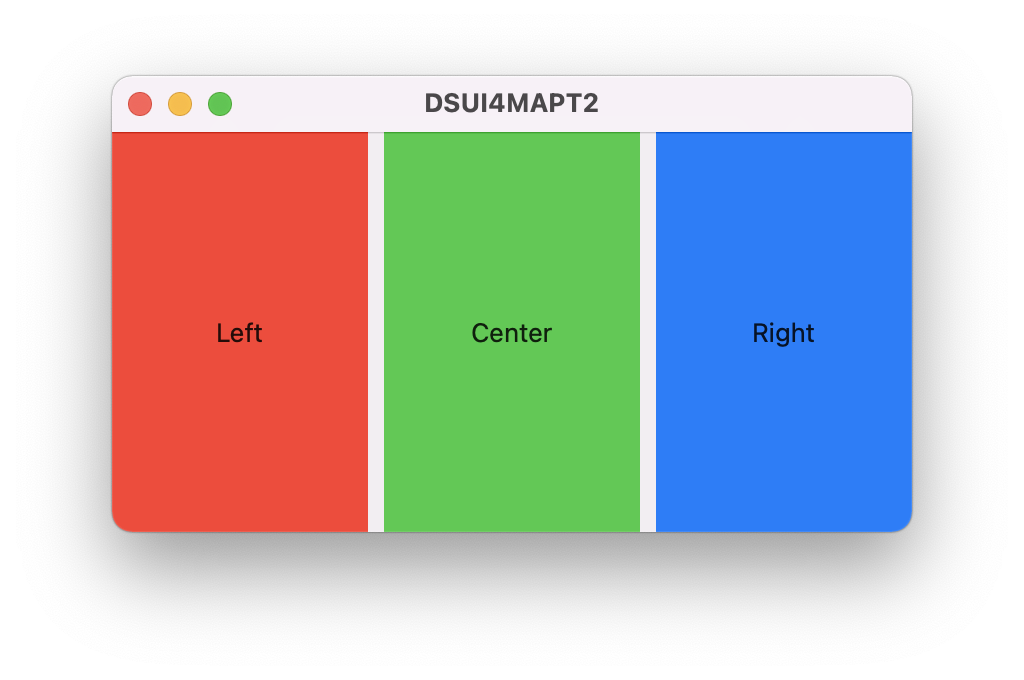
Initial HStack with three colored ZStacks
Let’s create an HStack with three colored ZStacks so you can better understand what will be doing.
struct ContentView: View {
    var body: some View {
        HStack {
            ZStack {
                Color.red
                Text("Left")
            }
            ZStack {
                Color.green
                Text("Center")
            }
            ZStack {
                Color.blue
                Text("Right")
            }
        }
        .frame(width: 400, height: 200)
    }
}
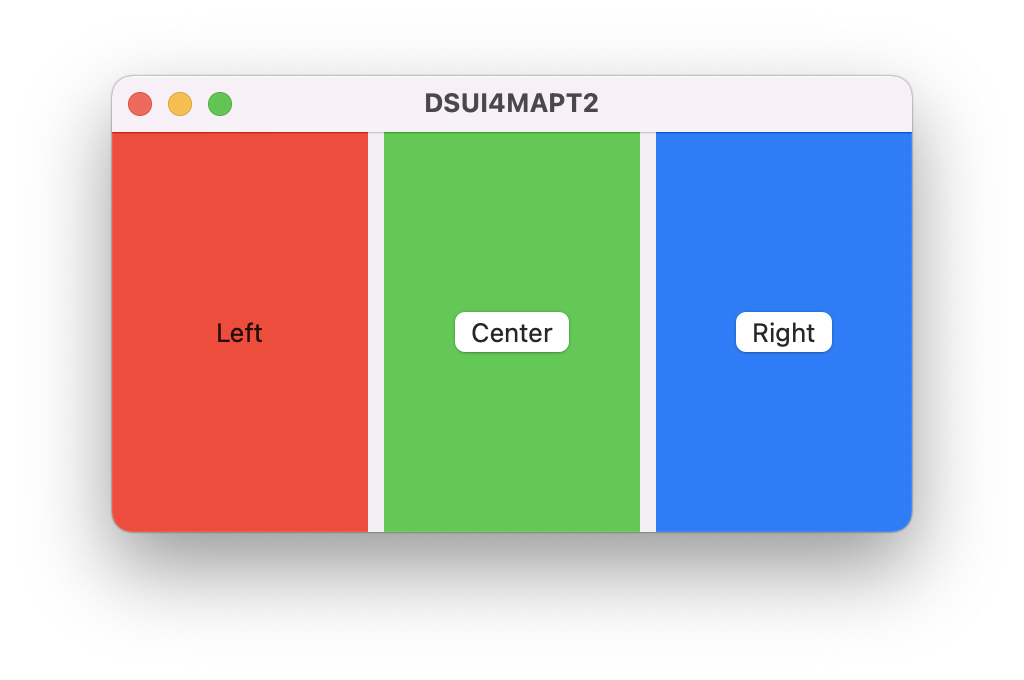
Adding buttons to center and right
Let’s create change our Text() calls to Button(). Button takes two properties, the first being your action and the second being your label
struct ContentView: View {
    var body: some View {
        HStack {
            ZStack {
                Color.red
                Text("Left")
            }
            ZStack {
                Color.green
                Button {
                    print("pressed center")
                } label: {
                    Text("Center")
                }
            }
            ZStack {
                Color.blue
                Button {
                    print("pressed right")
                } label: {
                    Text("Right")
                }
            }
        }
        .frame(width: 400, height: 200)
    }
}
When we press the buttons we should see console output in Xcode like the following:
pressed center
pressed right
Creating real button actions and updating the UI
In order for our buttons to do something, we must first create a @State property, creating a buttonState variable with a initial value of 0.
In our left view we will call change our image to Text(String(buttonState)) and which converts buttonState to a String so we can render it.
We can then take our buttons and pass an action of self.buttonState += 1 or self.buttonState -= 1 to increase or decrease the value.
struct ContentView: View {
    @State private var buttonState = 0
    var body: some View {
        HStack {
            ZStack {
                Color.red
                Text(String(buttonState))
            }
            ZStack {
                Color.green
                Button {
                    self.buttonState += 1
                } label: {
                    Text("Increase value")
                    print(buttonState)
                }
            }
            ZStack {
                Color.blue
                Button {
                    self.buttonState -= 1
                } label: {
                    Text("Decreate value")
                    print(buttonState)
                }
            }
        }
        .frame(width: 400, height: 200)
    }
}
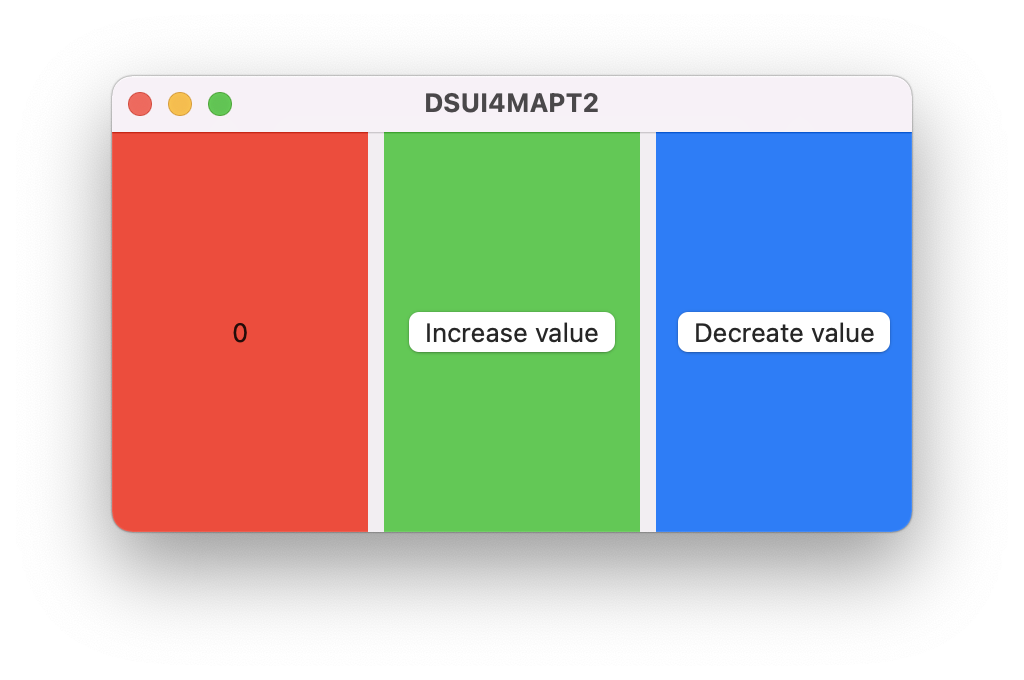
If we press the center button, our view will immediately update with our new value of 1. We will also see console output with the correct number.

If we press the right button twice, our view will immediately update with two new values of 0 and finally -1
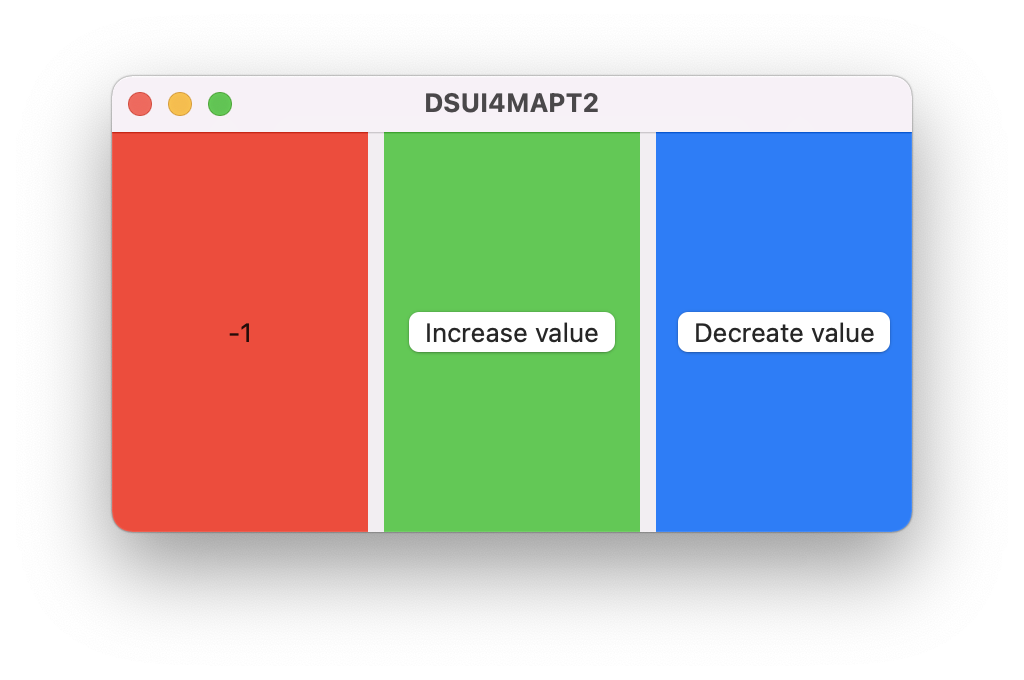
Our console output will look like this:
1
0
-1
This is great! Our view is updating immediately and the user feels like the buttons have real impact. But what if we start to have more complex views? This code is only readable because it’s small, but imagine having 15 text fields and multiple actions or buttons. In a single ContentView it would eventually be hard to read.
Moving each ZStack to its own struct (and pitfalls)
One common approach is moving your UI components into their own struct. Since we don’t want to repeat our buttonState variable multiple times, let’s move our @State property higher in our SwiftUI file.
Top level @State
@State private var buttonState = 0

struct ContentView: View {
    var body: some View {
        HStack {
            LeftView()
            CenterView()
            RightView()
        }
        .frame(width: 400, height: 200)
    }
}

struct LeftView: View {
    var body: some View {
        ZStack {
            Color.red
            Text(String(buttonState))
        }
    }
}

struct CenterView: View {
    var body: some View {
        ZStack {
            Color.green
            Button {
                buttonState += 1
                print(buttonState)
            } label: {
                Text("Increase value")
            }
        }
    }
}

struct RightView: View {
    var body: some View {
        ZStack {
            Color.blue
            Button {
                buttonState -= 1
                print(buttonState)
            } label: {
                Text("Decreate value")
            }
        }
    }
}
But when trying to compile our project we get this error: Property wrappers are not yet supported in top-level code. Only standard let and var can be passed outside of our struct.
Let’s try that instead.
Top level variables
var buttonState = 0

struct ContentView: View {
    var body: some View {
        HStack {
            LeftView()
            CenterView()
            RightView()
        }
        .frame(width: 400, height: 200)
    }
}

struct LeftView: View {
    var body: some View {
        ZStack {
            Color.red
            Text(String(buttonState))
        }
    }
}

struct CenterView: View {
    var body: some View {
        ZStack {
            Color.green
            Button {
                buttonState += 1
                print(buttonState)
            } label: {
                Text("Increase value")
            }
        }
    }
}

struct RightView: View {
    var body: some View {
        ZStack {
            Color.blue
            Button {
                buttonState -= 1
                print(buttonState)
            } label: {
                Text("Decreate value")
            }
        }
    }
}
Awesome, it now loads and when we press our buttons we see the same console output.
1
2
1
0
-1
But wait a minute, the text in the app isn’t updating. This is because @State is a special property built into SwiftUI. When a variable is tied to a @State and its updated, SwiftUI knows to update our view. By taking this special property out, we have broken that functionality.
Before we refactored our code, this is a simplified diagram of what happend.
--------------------------------------------- Conversation Start ---------------------------------------------
| ContentView(): initializing with @StateObject: publishing variable buttonState: initial value: 0           |
| .......................................................................................................... |
| Center ZStack: button pressed - buttonState new value: 1, updating view                                    |
| Center ZStack: Left ZStack, Right ZStack, please update your views                                         |
| LeftView(): Updating view                                                                                  |
| RightView(): Updating view                                                                                 |
--------------------------------------------- Conversation Ended ---------------------------------------------
But since we refactored, this is now what is happening.
--------------------------------------------- Conversation Start ---------------------------------------------
| publishing variable buttonState, initial value: 0                                                          |
| ContentView(): initializing                                                                                |
| .......................................................................................................... |
| CenterView(): button pressed - buttonState new value: 1, updating view                                     |
| CenterView(): LeftView(), RightView(), please update your views                                            |
| LeftView(): "I'm sorry but the person you called has a voicemail box that has not been setup yet. Goodbye" |
| RightView(): "I'm sorry but the person you called has a voicemail box that has not been setup yet. Goodbye"|
--------------------------------------------- Conversation Ended ---------------------------------------------
Great, so we’re essentially playing a game of telephone, but no one is answering the phones and worse, we can’t even leave them a message.
Moving to OberservableObject, StateObject and ObservedObject
If we want to have a proper conversation, we need to first create properties that can be both changed and observed. Let’s create a class of ViewState with a property of ObservableObject. Within there, we will create a variable of buttonState with our initial value.
ObservableObject
class ViewState: ObservableObject {
    @Published var buttonState = 0
}
This tells SwiftUI that buttonState can change and also be observed for changes. When one struct changes the value, other structs will be informed of this.
StateObject
Now in our ContentView let’s call our ViewState class and make it a @StateObject. This is similar to what we did earlier with @State but allows us to track multiple variables instead of a single one.
class ViewState: ObservableObject {
    @Published var buttonState = 0
}

struct ContentView: View {
    @StateObject var viewState = ViewState()
    var body: some View {
        HStack {
            LeftView()
            CenterView()
            RightView()
        }
        .frame(width: 400, height: 200)
    }
}

struct LeftView: View {
    var body: some View {
        ZStack {
            Color.red
            Text(String(buttonState))
        }
    }
}

struct CenterView: View {
    var body: some View {
        ZStack {
            Color.green
            Button {
                buttonState += 1
                print(buttonState)
            } label: {
                Text("Increase value")
            }
        }
    }
}

struct RightView: View {
    var body: some View {
        ZStack {
            Color.blue
            Button {
                buttonState -= 1
                print(buttonState)
            } label: {
                Text("Decreate value")
            }
        }
    }
}
Now that we’ve added @StateObject when any changes occur to viewState variable, the application will immediately refresh.
Unfortunately, as coded, our application will no longer build. We get multiple errors of the following: Cannot find 'buttonState' in scope. This is because buttonState is no longer a standard variable. Let’s fix that.
ObservedObject
By adding @ObservedObject var viewObserved: ViewState into each of our Left/Center/Right views, we now tell those views to receive an object and utilize it in whatever way it’s passed.
buttonState becomes viewObserved.buttonState in our Left/Center/Right views because viewObserved is a @StateObject of the ViewState class that has a variable of buttonState. Still with me?
class ViewState: ObservableObject {
    @Published var buttonState = 0
}

struct ContentView: View {
    @StateObject var viewState = ViewState()
    var body: some View {
        HStack {
            LeftView(viewObserved: viewState)
            CenterView(viewObserved: viewState)
            RightView(viewObserved: viewState)
        }
        .frame(width: 400, height: 200)
    }
}

struct LeftView: View {
    @ObservedObject var viewObserved: ViewState
    var body: some View {
        ZStack {
            Color.red
            Text(String(viewObserved.buttonState))
        }
    }
}

struct CenterView: View {
    @ObservedObject var viewObserved: ViewState
    var body: some View {
        ZStack {
            Color.green
            Button {
                viewObserved.buttonState += 1
                print(viewObserved.buttonState)
            } label: {
                Text("Increase value")
            }
        }
    }
}

struct RightView: View {
    @ObservedObject var viewObserved: ViewState
    var body: some View {
        ZStack {
            Color.blue
            Button {
                viewObserved.buttonState -= 1
                print(viewObserved.buttonState)
            } label: {
                Text("Decreate value")
            }
        }
    }
}
If we press the center button, our view will immediately update with our new value of 1. We will also see console output with the correct number.
If we press the right button twice, our view will immediately update with two new values of 0 and finally -1
Our console output will look like this:
1
0
-1
Great! It’s working again. Why though? Let me try to explain with our handy conversation tool.
--------------------------------------------- Conversation Start ---------------------------------------------
| class ViewState(): publishing variable buttonState: initial value: 0                                       |
| ContentView(): initializing with @StateObject: publishing variable viewState: initial value: ViewState()   |
| .......................................................................................................... |
| ContentView(): initializing LeftView() with viewState variable                                             |
| LeftView(): initializing with @ObservedObject: publishing variable viewObserved: value: viewState          |
| .......................................................................................................... |
| ContentView(): initializing CenterView() with viewState variable                                           |
| CenterView(): initializing with @ObservedObject: publishing variable viewObserved: value: viewState        |
| .......................................................................................................... |
| ContentView(): initializing RightView() with viewState variable                                            |
| RightView(): initializing with @ObservedObject: publishing variable viewObserved: value: viewState         |
| .......................................................................................................... |
| CenterView(): button pressed - buttonState new value: 1, updating view                                     |
| CenterView(): LeftView(), RightView(), please update your views                                            |
| LeftView(): Updating view                                                                                  |
| RightView(): Updating view                                                                                 |
| .......................................................................................................... |
| RightView(): button pressed - buttonState new value: 0, updating view                                      |
| RightView(): LeftView(), RightView(), please update your views                                             |
| LeftView(): Updating view                                                                                  |
| CenterView(): Updating view                                                                                |
| .......................................................................................................... |
| RightView(): button pressed - buttonState new value: -1, updating view                                     |
| RightView(): LeftView(), RightView(), please update your views                                             |
| LeftView(): Updating view                                                                                  |
| CenterView(): Updating view                                                                                |
--------------------------------------------- Conversation Ended ---------------------------------------------
Conclusion
As you can see, when refactoring code into multiple view, you must be careful to pass state and objects in and out of your view. If you don’t you will end up with partial updates to your UI and confusing behavior to your end-users.
If you would like to see the entire project, go here
If you would like to see any more examples of SwiftUI, please contact me. Until next time!