This past week was WWDC ‘21 and I came away pretty inspired with Apple’s new features in Swift 5.5 and SwiftUI 3. Ultimately in just a few days I was able to create a new onboarding app called hello based on Kandji’s Liftoff.
Within hello is a really cool use of ZStack that I thought would be a good primer for macadmins to learn.
Getting started
In order to follow along, you will need the following:
After instaling Xcode, do the following:
- Xcode -> New -> Project -> macOS -> App
- Ensure your interface is set to “SwiftUI”
Call the project DSUI4MAPT1
Initial SwiftUI code provided by Apple
In your project tree, you will see a ContentView file.
//
//  ContentView.swift
//  DSUI4MAPT1
//
//  Created by Erik Gomez on 6/13/21.
//

import SwiftUI

struct ContentView: View {
    var body: some View {
        Text("Hello, world!")
            .padding()
    }
}

struct ContentView_Previews: PreviewProvider {
    static var previews: some View {
        ContentView()
    }
}
When previewing this in Xcode you should see the following

Initial Image
If you open up the SF Symbols application, you will find a ton of useful images that you can directly embed into your SwiftUI project.
Let’s apply one using Image() passing in systemName
struct ContentView: View {
var body: some View {
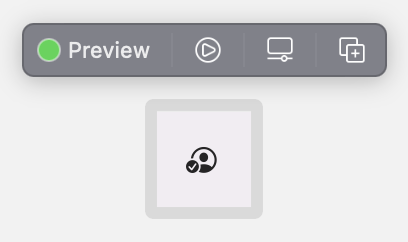
Image(systemName: "person.crop.circle.badge.checkmark")
.padding()
}
}
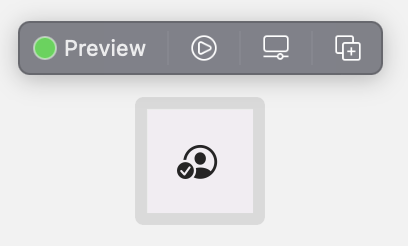
Make Image a little bigger by giving it a built-in font type
Apple provides the .font property and we can pass built-in sub-properties like .title2 to increase the size of our symbol.
struct ContentView: View {
    var body: some View {
        Image(systemName: "person.crop.circle.badge.checkmark")
            .font(.title2)
            .padding()
    }
}
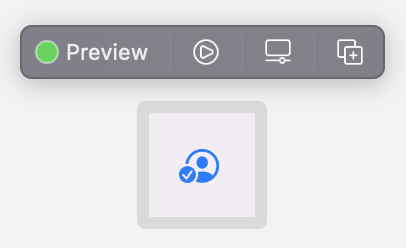
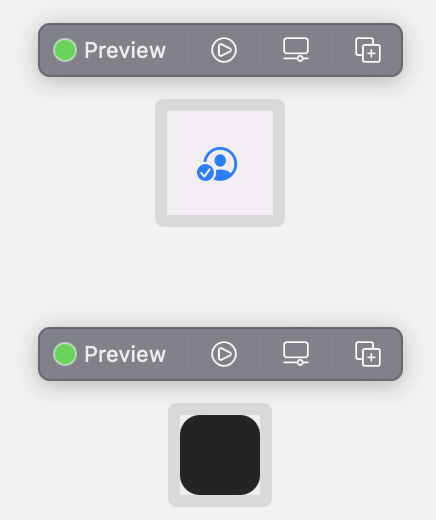
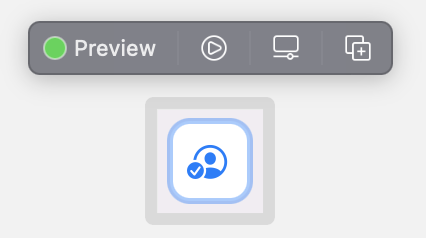
Give the icon some color
Apple also provides the .foregroundColor property, which also accepts built-in sub-properties. Here we are using .accentColor which dynamically change based on Light/Dark mode and any custom accent color a user may apply.
struct ContentView: View {
    var body: some View {
        Image(systemName: "person.crop.circle.badge.checkmark")
            .font(.title2)
            .foregroundColor(.accentColor)
            .padding()
    }
}
Creating a 40 pixel RoundedRectangle
Now that we have our image, let’s try to make it look more like an “AppIcon”. First, let’s use RoundedRectangle, which takes a variable of cornerRadius allowing us to create our starting point. Passing in .frame() allows us to define how large we want the rectangle.
struct ContentView: View {
    var body: some View {
        Image(systemName: "person.crop.circle.badge.checkmark")
            .font(.title2)
            .foregroundColor(.accentColor)
            .padding()

        RoundedRectangle(cornerRadius: 10)
            .frame(width: 40, height: 40)
    }
}
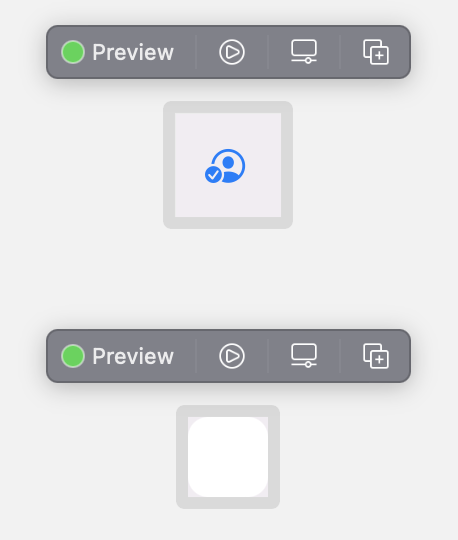
Setting the RoundedRectangle color to the text background color
By utilizing the .foregroundColor property, we can override the initial color. Passing NSColor.textBackgroundColor allows us to pass another dynamic property that changes between a user’s color options.
struct ContentView: View {
    var body: some View {
        Image(systemName: "person.crop.circle.badge.checkmark")
            .font(.title2)
            .foregroundColor(.accentColor)
            .padding()

        RoundedRectangle(cornerRadius: 10)
            .frame(width: 40, height: 40)
            .foregroundColor(Color(NSColor.textBackgroundColor))
    }
}
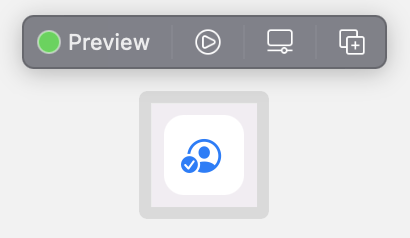
Moving the RoundedRectangle into the background property of Image
Now that we have the RoundedRectangle we like, we can move it into the .background() property that Apple provides for Image()
struct ContentView: View {
    var body: some View {
        Image(systemName: "person.crop.circle.badge.checkmark")
            .font(.title2)
            .foregroundColor(.accentColor)
            .padding()
            .background(
                RoundedRectangle(cornerRadius: 10)
                    .frame(width: 40, height: 40)
                    .foregroundColor(Color(NSColor.textBackgroundColor))
            )
    }
}
It’s looking more like an AppIcon now, but we can do a little more to make it better.
Create a RoundRectangle overlay onto our Image
Apple also provides the .overlay() property. Again, we can pass a RoundedRectangle to match our background, but let’s also add .stroke() property with the color blue.
struct ContentView: View {
    var body: some View {
        Image(systemName: "person.crop.circle.badge.checkmark")
            .font(.title2)
            .foregroundColor(.accentColor)
            .padding()
            .background(
                RoundedRectangle(cornerRadius: 10)
                    .frame(width: 40, height: 40)
                    .foregroundColor(Color(NSColor.textBackgroundColor))
            )
            .overlay(
                RoundedRectangle(cornerRadius: 10)
                    .stroke(Color.blue, lineWidth: 3)
                    .frame(width: 40, height: 40)
            )
    }
}
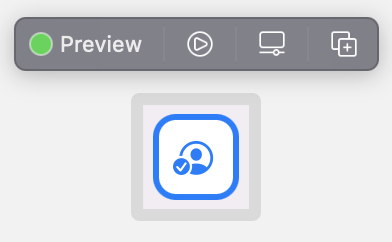
This looks good, but it will look even better if it’s slightly less blue on the stroke.
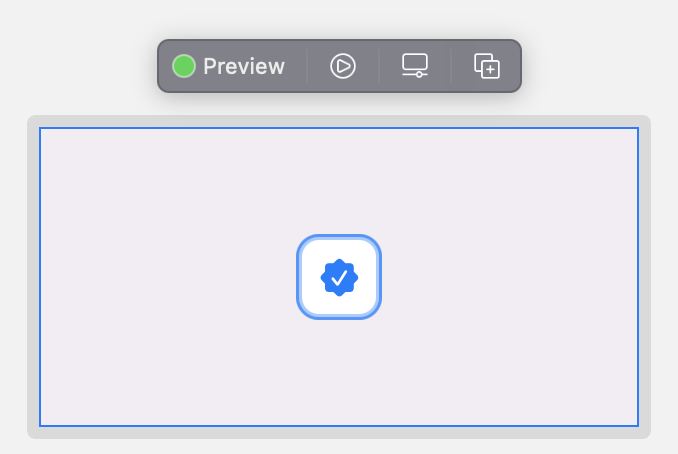
Enabling opacity in the RoundedRectangle overlay
By adding the .opacity property within the RoundedRectangle() overlay, we can tone the blue down just a bit.
struct ContentView: View {
    var body: some View {
        Image(systemName: "person.crop.circle.badge.checkmark")
            .font(.title2)
            .foregroundColor(.accentColor)
            .padding()
            .background(
                RoundedRectangle(cornerRadius: 10)
                    .frame(width: 40, height: 40)
                    .foregroundColor(Color(NSColor.textBackgroundColor))
            )
            .overlay(
                RoundedRectangle(cornerRadius: 10)
                    .stroke(Color.blue, lineWidth: 3)
                    .opacity(0.4)
                    .frame(width: 40, height: 40)
            )
    }
}
This looks great! Now we are getting somewhere. Let’s keep going.
Creating multiple images
Now that we know how to make a single image, let’s add more.
Moving Image to a HStack
To start off with, we will create a new HStack() and move our initial image into it.
struct ContentView: View {
    var body: some View {
        HStack {
            Image(systemName: "person.crop.circle.badge.checkmark")
                .font(.title2)
                .foregroundColor(.accentColor)
                .padding()
                .background(
                    RoundedRectangle(cornerRadius: 10)
                        .frame(width: 40, height: 40)
                        .foregroundColor(Color(NSColor.textBackgroundColor))
                )
                .overlay(
                    RoundedRectangle(cornerRadius: 10)
                        .stroke(Color.blue, lineWidth: 3)
                        .opacity(0.4)
                        .frame(width: 40, height: 40)
                )
        }
    }
}
While it looks identical, we now have scaffolding to place multiple images across a horizontal border.
Adding two more images
By duplicating our Image() and changing the systemName variable, we can create more icons with other SF Symbols.
struct ContentView: View {
    var body: some View {
        HStack {
            Image(systemName: "person.crop.circle.badge.checkmark")
                .font(.title2)
                .foregroundColor(.accentColor)
                .padding()
                .background(
                    RoundedRectangle(cornerRadius: 10)
                        .frame(width: 40, height: 40)
                        .foregroundColor(Color(NSColor.textBackgroundColor))
                )
                .overlay(
                    RoundedRectangle(cornerRadius: 10)
                        .stroke(Color.blue, lineWidth: 3)
                        .opacity(0.4)
                        .frame(width: 40, height: 40)
                )

            Image(systemName: "tray.full.fill")
                .font(.title2)
                .foregroundColor(.accentColor)
                .padding()
                .background(
                    RoundedRectangle(cornerRadius: 10)
                        .frame(width: 40, height: 40)
                        .foregroundColor(Color(NSColor.textBackgroundColor))
                )
                .overlay(
                    RoundedRectangle(cornerRadius: 10)
                        .stroke(Color.blue, lineWidth: 3)
                        .opacity(0.4)
                        .frame(width: 40, height: 40)
                )

            Image(systemName: "checkmark.seal.fill")
                .font(.title2)
                .foregroundColor(.accentColor)
                .padding()
                .background(
                    RoundedRectangle(cornerRadius: 10)
                        .frame(width: 40, height: 40)
                        .foregroundColor(Color(NSColor.textBackgroundColor))
                )
                .overlay(
                    RoundedRectangle(cornerRadius: 10)
                        .stroke(Color.blue, lineWidth: 3)
                        .opacity(0.4)
                        .frame(width: 40, height: 40)
                )
        }
        .frame(width: 300, height: 150)
    }
}

Now that we have our three images, let’s use the power of ZStack to move away from the traditional x (horizontal) and y (vertical) positions.
Note: I also added a frame on the Stack to make it easier to view.
Initial ZStack
By simple changing HStack to ZStack we can completely change way Xcode renders our view.
struct ContentView: View {
    var body: some View {
        ZStack {
            Image(systemName: "person.crop.circle.badge.checkmark")
                .font(.title2)
                .foregroundColor(.accentColor)
                .padding()
                .background(
                    RoundedRectangle(cornerRadius: 10)
                        .frame(width: 40, height: 40)
                        .foregroundColor(Color(NSColor.textBackgroundColor))
                )
                .overlay(
                    RoundedRectangle(cornerRadius: 10)
                        .stroke(Color.blue, lineWidth: 3)
                        .opacity(0.4)
                        .frame(width: 40, height: 40)
                )

            Image(systemName: "tray.full.fill")
                .font(.title2)
                .foregroundColor(.accentColor)
                .padding()
                .background(
                    RoundedRectangle(cornerRadius: 10)
                        .frame(width: 40, height: 40)
                        .foregroundColor(Color(NSColor.textBackgroundColor))
                )
                .overlay(
                    RoundedRectangle(cornerRadius: 10)
                        .stroke(Color.blue, lineWidth: 3)
                        .opacity(0.4)
                        .frame(width: 40, height: 40)
                )

            Image(systemName: "checkmark.seal.fill")
                .font(.title2)
                .foregroundColor(.accentColor)
                .padding()
                .background(
                    RoundedRectangle(cornerRadius: 10)
                        .frame(width: 40, height: 40)
                        .foregroundColor(Color(NSColor.textBackgroundColor))
                )
                .overlay(
                    RoundedRectangle(cornerRadius: 10)
                        .stroke(Color.blue, lineWidth: 3)
                        .opacity(0.4)
                        .frame(width: 40, height: 40)
                )
        }
        .frame(width: 300, height: 150)
    }
}
We are back to a single image. Why? Because we have now placed images on top of each other and the by default, the images are placed in priority in reverse order of how your code is written.
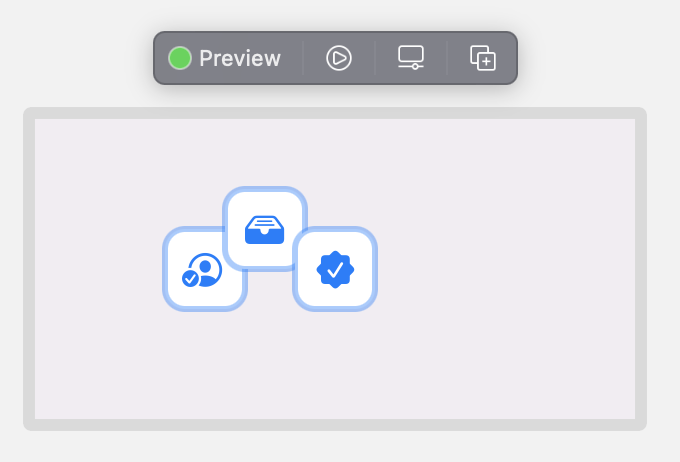
Using positional offsets to move the icons
Using the .offset property, we can pass x and y positions to change where we want our image to load.
- A negative number on the x-axis moves an object to the left, while a positive number moves an object to the right.
- A negative number on the y-axis moves an object lower, while a positive number moves an object higher.
struct ContentView: View {
    var body: some View {
        ZStack {
            Image(systemName: "person.crop.circle.badge.checkmark")
                .font(.title2)
                .foregroundColor(.accentColor)
                .padding()
                .background(
                    RoundedRectangle(cornerRadius: 10)
                        .frame(width: 40, height: 40)
                        .foregroundColor(Color(NSColor.textBackgroundColor))
                )
                .overlay(
                    RoundedRectangle(cornerRadius: 10)
                        .stroke(Color.blue, lineWidth: 3)
                        .opacity(0.4)
                        .frame(width: 40, height: 40)
                )
                .offset(x: -65, y: 0)

            Image(systemName: "tray.full.fill")
                .font(.title2)
                .foregroundColor(.accentColor)
                .padding()
                .background(
                    RoundedRectangle(cornerRadius: 10)
                        .frame(width: 40, height: 40)
                        .foregroundColor(Color(NSColor.textBackgroundColor))
                )
                .overlay(
                    RoundedRectangle(cornerRadius: 10)
                        .stroke(Color.blue, lineWidth: 3)
                        .opacity(0.4)
                        .frame(width: 40, height: 40)
                )
                .offset(x: -35, y: -20)
        }
        .frame(width: 300, height: 150)
    }
}
Now lets add more icons
Six Images
Let’s continue to re-use Image() and add more icons, with more offsets.
struct ContentView: View {
    var body: some View {
        ZStack {
            Image(systemName: "person.crop.circle.badge.checkmark")
                .font(.title2)
                .foregroundColor(.accentColor)
                .padding()
                .background(
                    RoundedRectangle(cornerRadius: 10)
                        .frame(width: 40, height: 40)
                        .foregroundColor(Color(NSColor.textBackgroundColor))
                )
                .overlay(
                    RoundedRectangle(cornerRadius: 10)
                        .stroke(Color.blue, lineWidth: 3)
                        .opacity(0.4)
                        .frame(width: 40, height: 40)
                )
                .offset(x: -65, y: 0)

            Image(systemName: "tray.full.fill")
                .font(.title2)
                .foregroundColor(.accentColor)
                .padding()
                .background(
                    RoundedRectangle(cornerRadius: 10)
                        .frame(width: 40, height: 40)
                        .foregroundColor(Color(NSColor.textBackgroundColor))
                )
                .overlay(
                    RoundedRectangle(cornerRadius: 10)
                        .stroke(Color.blue, lineWidth: 3)
                        .opacity(0.4)
                        .frame(width: 40, height: 40)
                )
                .offset(x: -35, y: -20)

            Image(systemName: "checkmark.seal.fill")
                .font(.title2)
                .foregroundColor(.accentColor)
                .padding()
                .background(
                    RoundedRectangle(cornerRadius: 10)
                        .frame(width: 40, height: 40)
                        .foregroundColor(Color(NSColor.textBackgroundColor))
                )
                .overlay(
                    RoundedRectangle(cornerRadius: 10)
                        .stroke(Color.blue, lineWidth: 3)
                        .opacity(0.4)
                        .frame(width: 40, height: 40)
                )
                .offset(x: 0, y: 0)

            Image(systemName: "link.circle.fill")
                .font(.title2)
                .foregroundColor(.accentColor)
                .padding()
                .background(
                    RoundedRectangle(cornerRadius: 10)
                        .frame(width: 40, height: 40)
                        .foregroundColor(Color(NSColor.textBackgroundColor))
                )
                .overlay(
                    RoundedRectangle(cornerRadius: 10)
                        .stroke(Color.blue, lineWidth: 3)
                        .opacity(0.4)
                        .frame(width: 40, height: 40)
                )
                .offset(x: 35, y: -20)

            Image(systemName: "arrow.down.doc.fill")
                .font(.title2)
                .foregroundColor(.accentColor)
                .padding()
                .background(
                    RoundedRectangle(cornerRadius: 10)
                        .frame(width: 40, height: 40)
                        .foregroundColor(Color(NSColor.textBackgroundColor))
                )
                .overlay(
                    RoundedRectangle(cornerRadius: 10)
                        .stroke(Color.blue, lineWidth: 3)
                        .opacity(0.4)
                        .frame(width: 40, height: 40)
                )
                .offset(x: 65, y: 0)

            Image(systemName: "folder.fill")
                .font(.title2)
                .foregroundColor(.accentColor)
                .padding()
                .background(
                    RoundedRectangle(cornerRadius: 10)
                        .frame(width: 40, height: 40)
                        .foregroundColor(Color(NSColor.textBackgroundColor))
                )
                .overlay(
                    RoundedRectangle(cornerRadius: 10)
                        .stroke(Color.blue, lineWidth: 3)
                        .opacity(0.4)
                        .frame(width: 40, height: 40)
                )
                .offset(x: 95, y: -20)
        }
        .frame(width: 300, height: 150)
    }
}
This looks good, but there is another modifier we can use to give our hero image more depth.
Changing z-axis position with zIndex
By default, an item starts with a zIndex of 0, so decreasing its index moves it to the background. -2 is behind -1, which is behind 0. You can also increase the index, but for this example, we will not be using that.
struct ContentView: View {
    var body: some View {
        ZStack {
            Image(systemName: "person.crop.circle.badge.checkmark")
                .font(.title2)
                .foregroundColor(.accentColor)
                .padding()
                .background(
                    RoundedRectangle(cornerRadius: 10)
                        .frame(width: 40, height: 40)
                        .foregroundColor(Color(NSColor.textBackgroundColor))
                )
                .overlay(
                    RoundedRectangle(cornerRadius: 10)
                        .stroke(Color.blue, lineWidth: 3)
                        .opacity(0.4)
                        .frame(width: 40, height: 40)
                )
                .offset(x: -65, y: 0)
                .zIndex(-2)

            Image(systemName: "tray.full.fill")
                .font(.title2)
                .foregroundColor(.accentColor)
                .padding()
                .background(
                    RoundedRectangle(cornerRadius: 10)
                        .frame(width: 40, height: 40)
                        .foregroundColor(Color(NSColor.textBackgroundColor))
                )
                .overlay(
                    RoundedRectangle(cornerRadius: 10)
                        .stroke(Color.blue, lineWidth: 3)
                        .opacity(0.4)
                        .frame(width: 40, height: 40)
                )
                .offset(x: -35, y: -20)
                .zIndex(-1)

            Image(systemName: "checkmark.seal.fill")
                .font(.title2)
                .foregroundColor(.accentColor)
                .padding()
                .background(
                    RoundedRectangle(cornerRadius: 10)
                        .frame(width: 40, height: 40)
                        .foregroundColor(Color(NSColor.textBackgroundColor))
                )
                .overlay(
                    RoundedRectangle(cornerRadius: 10)
                        .stroke(Color.blue, lineWidth: 3)
                        .opacity(0.4)
                        .frame(width: 40, height: 40)
                )
                .offset(x: 0, y: 0)
                .zIndex(0)

            Image(systemName: "link.circle.fill")
                .font(.title2)
                .foregroundColor(.accentColor)
                .padding()
                .background(
                    RoundedRectangle(cornerRadius: 10)
                        .frame(width: 40, height: 40)
                        .foregroundColor(Color(NSColor.textBackgroundColor))
                )
                .overlay(
                    RoundedRectangle(cornerRadius: 10)
                        .stroke(Color.blue, lineWidth: 3)
                        .opacity(0.4)
                        .frame(width: 40, height: 40)
                )
                .offset(x: 35, y: -20)
                .zIndex(-1)

            Image(systemName: "arrow.down.doc.fill")
                .font(.title2)
                .foregroundColor(.accentColor)
                .padding()
                .background(
                    RoundedRectangle(cornerRadius: 10)
                        .frame(width: 40, height: 40)
                        .foregroundColor(Color(NSColor.textBackgroundColor))
                )
                .overlay(
                    RoundedRectangle(cornerRadius: 10)
                        .stroke(Color.blue, lineWidth: 3)
                        .opacity(0.4)
                        .frame(width: 40, height: 40)
                )
                .offset(x: 65, y: 0)
                .zIndex(-2)

            Image(systemName: "folder.fill")
                .font(.title2)
                .foregroundColor(.accentColor)
                .padding()
                .background(
                    RoundedRectangle(cornerRadius: 10)
                        .frame(width: 40, height: 40)
                        .foregroundColor(Color(NSColor.textBackgroundColor))
                )
                .overlay(
                    RoundedRectangle(cornerRadius: 10)
                        .stroke(Color.blue, lineWidth: 3)
                        .opacity(0.4)
                        .frame(width: 40, height: 40)
                )
                .offset(x: 95, y: -20)
                .zIndex(-3)

        }
        .frame(width: 300, height: 150)
    }
}
The changes are subtle, but effective.
We are really close to our final look, but let’s do one more thing.
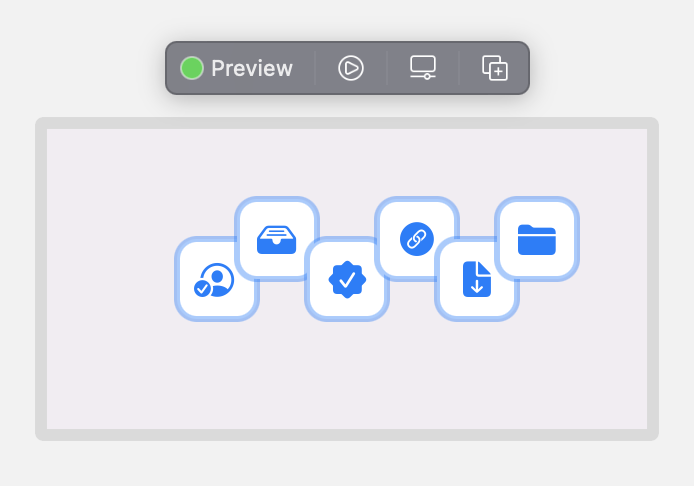
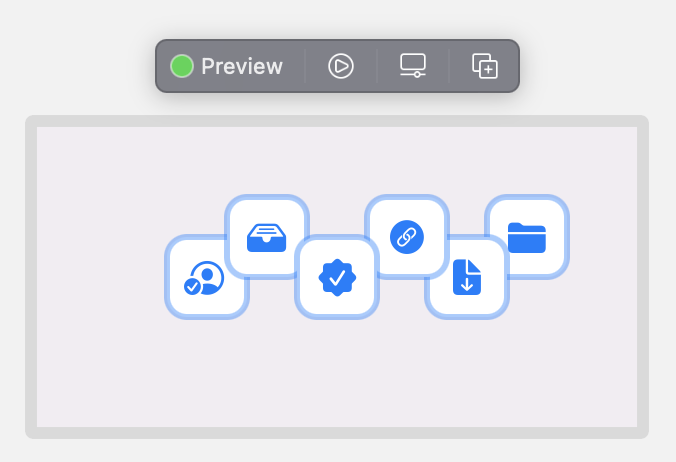
Changing some of the icons font size and size to create more depth.
By changing the .font and .frame properties, we can make the “AppIcons” bigger and smaller.
struct ContentView: View {
    var body: some View {
        ZStack {
            Image(systemName: "person.crop.circle.badge.checkmark")
                .font(.title2)
                .foregroundColor(.accentColor)
                .padding()
                .background(
                    RoundedRectangle(cornerRadius: 10)
                        .frame(width: 35, height: 35)
                        .foregroundColor(Color(NSColor.textBackgroundColor))
                )
                .overlay(
                    RoundedRectangle(cornerRadius: 10)
                        .stroke(Color.blue, lineWidth: 3)
                        .opacity(0.4)
                        .frame(width: 35, height: 35)
                )
                .offset(x: -65, y: 0)
                .zIndex(-2)

            Image(systemName: "tray.full.fill")
                .font(.title)
                .foregroundColor(.accentColor)
                .padding()
                .background(
                    RoundedRectangle(cornerRadius: 10)
                        .frame(width: 40, height: 40)
                        .foregroundColor(Color(NSColor.textBackgroundColor))
                )
                .overlay(
                    RoundedRectangle(cornerRadius: 10)
                        .stroke(Color.blue, lineWidth: 3)
                        .opacity(0.4)
                        .frame(width: 40, height: 40)
                )
                .offset(x: -35, y: -20)
                .zIndex(-1)

            Image(systemName: "checkmark.seal.fill")
                .font(.largeTitle)
                .foregroundColor(.accentColor)
                .padding()
                .background(
                    RoundedRectangle(cornerRadius: 10)
                        .frame(width: 45, height: 45)
                        .foregroundColor(Color(NSColor.textBackgroundColor))
                )
                .overlay(
                    RoundedRectangle(cornerRadius: 10)
                        .stroke(Color.blue, lineWidth: 3)
                        .opacity(0.4)
                        .frame(width: 45, height: 45)
                )
                .offset(x: 0, y: 0)
                .zIndex(0)

            Image(systemName: "link.circle.fill")
                .font(.largeTitle)
                .foregroundColor(.accentColor)
                .padding()
                .background(
                    RoundedRectangle(cornerRadius: 10)
                        .frame(width: 45, height: 45)
                        .foregroundColor(Color(NSColor.textBackgroundColor))
                )
                .overlay(
                    RoundedRectangle(cornerRadius: 10)
                        .stroke(Color.blue, lineWidth: 3)
                        .opacity(0.4)
                        .frame(width: 45, height: 45)
                )
                .offset(x: 35, y: -20)
                .zIndex(-1)

            Image(systemName: "arrow.down.doc.fill")
                .font(.title)
                .foregroundColor(.accentColor)
                .padding()
                .background(
                    RoundedRectangle(cornerRadius: 10)
                        .frame(width: 40, height: 40)
                        .foregroundColor(Color(NSColor.textBackgroundColor))
                )
                .overlay(
                    RoundedRectangle(cornerRadius: 10)
                        .stroke(Color.blue, lineWidth: 3)
                        .opacity(0.4)
                        .frame(width: 40, height: 40)
                )
                .offset(x: 65, y: 0)
                .zIndex(-2)

            Image(systemName: "folder.fill")
                .font(.title2)
                .foregroundColor(.accentColor)
                .padding()
                .background(
                    RoundedRectangle(cornerRadius: 10)
                        .frame(width: 35, height: 35)
                        .foregroundColor(Color(NSColor.textBackgroundColor))
                )
                .overlay(
                    RoundedRectangle(cornerRadius: 10)
                        .stroke(Color.blue, lineWidth: 3)
                        .opacity(0.4)
                        .frame(width: 35, height: 35)
                )
                .offset(x: 95, y: -20)
                .zIndex(-3)
        }
        .frame(width: 300, height: 150)
    }
}
With a simple change of the font style and a larger or smaller frame, we can create a little more flair to our image.
With that we are done!
Or are we? While it looks great, we repeated a ton of code. Let’s optimize our code now to reduce the repitition.
Creating another struct with variables.
SwiftUI is powerful and allows us to conditionally call other pieces our UI and put them into another view.
Creating a new struct and moving some code
Let’s do a few things
- Rename our
ContentViewstruct toHeroSubImageView - Create a new
ContentViewstruct with our original ZStack, that callsHeroSubImageView
struct ContentView: View {
    var body: some View {
        ZStack {
            HeroSubImageView()
        }
        .frame(width: 300, height: 150)
    }
}

struct HeroSubImageView: View {
    var body: some View {
        Image(systemName: "person.crop.circle.badge.checkmark")
            .font(.title2)
            .foregroundColor(.accentColor)
            .padding()
            .background(
                RoundedRectangle(cornerRadius: 10)
                    .frame(width: 35, height: 35)
                    .foregroundColor(Color(NSColor.textBackgroundColor))
            )
            .overlay(
                RoundedRectangle(cornerRadius: 10)
                    .stroke(Color.blue, lineWidth: 3)
                    .opacity(0.4)
                    .frame(width: 35, height: 35)
            )
            .offset(x: -65, y: 0)
            .zIndex(-2)

        Image(systemName: "tray.full.fill")
            .font(.title)
            .foregroundColor(.accentColor)
            .padding()
            .background(
                RoundedRectangle(cornerRadius: 10)
                    .frame(width: 40, height: 40)
                    .foregroundColor(Color(NSColor.textBackgroundColor))
            )
            .overlay(
                RoundedRectangle(cornerRadius: 10)
                    .stroke(Color.blue, lineWidth: 3)
                    .opacity(0.4)
                    .frame(width: 40, height: 40)
            )
            .offset(x: -35, y: -20)
            .zIndex(-1)

        Image(systemName: "checkmark.seal.fill")
            .font(.largeTitle)
            .foregroundColor(.accentColor)
            .padding()
            .background(
                RoundedRectangle(cornerRadius: 10)
                    .frame(width: 45, height: 45)
                    .foregroundColor(Color(NSColor.textBackgroundColor))
            )
            .overlay(
                RoundedRectangle(cornerRadius: 10)
                    .stroke(Color.blue, lineWidth: 3)
                    .opacity(0.4)
                    .frame(width: 45, height: 45)
            )
            .offset(x: 0, y: 0)
            .zIndex(0)

        Image(systemName: "link.circle.fill")
            .font(.largeTitle)
            .foregroundColor(.accentColor)
            .padding()
            .background(
                RoundedRectangle(cornerRadius: 10)
                    .frame(width: 45, height: 45)
                    .foregroundColor(Color(NSColor.textBackgroundColor))
            )
            .overlay(
                RoundedRectangle(cornerRadius: 10)
                    .stroke(Color.blue, lineWidth: 3)
                    .opacity(0.4)
                    .frame(width: 45, height: 45)
            )
            .offset(x: 35, y: -20)
            .zIndex(-1)

        Image(systemName: "arrow.down.doc.fill")
            .font(.title)
            .foregroundColor(.accentColor)
            .padding()
            .background(
                RoundedRectangle(cornerRadius: 10)
                    .frame(width: 40, height: 40)
                    .foregroundColor(Color(NSColor.textBackgroundColor))
            )
            .overlay(
                RoundedRectangle(cornerRadius: 10)
                    .stroke(Color.blue, lineWidth: 3)
                    .opacity(0.4)
                    .frame(width: 40, height: 40)
            )
            .offset(x: 65, y: 0)
            .zIndex(-2)

        Image(systemName: "folder.fill")
            .font(.title2)
            .foregroundColor(.accentColor)
            .padding()
            .background(
                RoundedRectangle(cornerRadius: 10)
                    .frame(width: 35, height: 35)
                    .foregroundColor(Color(NSColor.textBackgroundColor))
            )
            .overlay(
                RoundedRectangle(cornerRadius: 10)
                    .stroke(Color.blue, lineWidth: 3)
                    .opacity(0.4)
                    .frame(width: 35, height: 35)
            )
            .offset(x: 95, y: -20)
            .zIndex(-3)
    }
}
Notice that our Xcode preview page does not change! SwiftUI is smart enough to recreate our configuration as even though it is in two structs, it is essentially identical code. Now let’s begin the real optimization.
Adding required variables to HeroSubImageView
Swift allows us to take a struct and add required variables, enabling us to pass them in. Think of this as a function that takes variables.
struct ContentView: View {
    var body: some View {
        ZStack {
            HeroSubImageView(font: .title, imageHeight: 1, imageWidth: 1, xOffset: 1, yOffSet: 1, symbolName: "some.symbol", zIndex: 1)
        }
        .frame(width: 300, height: 150)
    }
}

struct HeroSubImageView: View {
    var font: Font
    var imageHeight, imageWidth, xOffset, yOffSet: CGFloat
    var symbolName: String
    var zIndex: Double
    var body: some View {
        Image(systemName: "person.crop.circle.badge.checkmark")
            .font(.title2)
            .foregroundColor(.accentColor)
            .padding()
            .background(
                RoundedRectangle(cornerRadius: 10)
                    .frame(width: 35, height: 35)
                    .foregroundColor(Color(NSColor.textBackgroundColor))
            )
            .overlay(
                RoundedRectangle(cornerRadius: 10)
                    .stroke(Color.blue, lineWidth: 3)
                    .opacity(0.4)
                    .frame(width: 35, height: 35)
            )
            .offset(x: -65, y: 0)
            .zIndex(-2)

        Image(systemName: "tray.full.fill")
            .font(.title)
            .foregroundColor(.accentColor)
            .padding()
            .background(
                RoundedRectangle(cornerRadius: 10)
                    .frame(width: 40, height: 40)
                    .foregroundColor(Color(NSColor.textBackgroundColor))
            )
            .overlay(
                RoundedRectangle(cornerRadius: 10)
                    .stroke(Color.blue, lineWidth: 3)
                    .opacity(0.4)
                    .frame(width: 40, height: 40)
            )
            .offset(x: -35, y: -20)
            .zIndex(-1)

        Image(systemName: "checkmark.seal.fill")
            .font(.largeTitle)
            .foregroundColor(.accentColor)
            .padding()
            .background(
                RoundedRectangle(cornerRadius: 10)
                    .frame(width: 45, height: 45)
                    .foregroundColor(Color(NSColor.textBackgroundColor))
            )
            .overlay(
                RoundedRectangle(cornerRadius: 10)
                    .stroke(Color.blue, lineWidth: 3)
                    .opacity(0.4)
                    .frame(width: 45, height: 45)
            )
            .offset(x: 0, y: 0)
            .zIndex(0)

        Image(systemName: "link.circle.fill")
            .font(.largeTitle)
            .foregroundColor(.accentColor)
            .padding()
            .background(
                RoundedRectangle(cornerRadius: 10)
                    .frame(width: 45, height: 45)
                    .foregroundColor(Color(NSColor.textBackgroundColor))
            )
            .overlay(
                RoundedRectangle(cornerRadius: 10)
                    .stroke(Color.blue, lineWidth: 3)
                    .opacity(0.4)
                    .frame(width: 45, height: 45)
            )
            .offset(x: 35, y: -20)
            .zIndex(-1)

        Image(systemName: "arrow.down.doc.fill")
            .font(.title)
            .foregroundColor(.accentColor)
            .padding()
            .background(
                RoundedRectangle(cornerRadius: 10)
                    .frame(width: 40, height: 40)
                    .foregroundColor(Color(NSColor.textBackgroundColor))
            )
            .overlay(
                RoundedRectangle(cornerRadius: 10)
                    .stroke(Color.blue, lineWidth: 3)
                    .opacity(0.4)
                    .frame(width: 40, height: 40)
            )
            .offset(x: 65, y: 0)
            .zIndex(-2)

        Image(systemName: "folder.fill")
            .font(.title2)
            .foregroundColor(.accentColor)
            .padding()
            .background(
                RoundedRectangle(cornerRadius: 10)
                    .frame(width: 35, height: 35)
                    .foregroundColor(Color(NSColor.textBackgroundColor))
            )
            .overlay(
                RoundedRectangle(cornerRadius: 10)
                    .stroke(Color.blue, lineWidth: 3)
                    .opacity(0.4)
                    .frame(width: 35, height: 35)
            )
            .offset(x: 95, y: -20)
            .zIndex(-3)

    }
}
As before, our view remains unchanged. We are passing bogus data to the function in our ConventView as we have not hooked up these variables to anything yet.
Utilizing HeroSubImageView with variables.
Let’s remove all of the Image() calls in HeroSubImageView and put our newly creates variables into the areas where want to utilize them. Now instead of hardcoding values, we can pass them as variables to each of the SwiftUI properties through our original ContentView struct.
struct ContentView: View {
    var body: some View {
        ZStack {
            HeroSubImageView(font: .largeTitle, imageHeight: 45, imageWidth: 45, xOffset: 0, yOffSet: 0, symbolName: "checkmark.seal.fill", zIndex: 0)
        }
        .frame(width: 300, height: 150)
    }
}

struct HeroSubImageView: View {
    var font: Font
    var imageHeight, imageWidth, xOffset, yOffSet: CGFloat
    var symbolName: String
    var zIndex: Double

    var body: some View {
        Image(systemName: symbolName)
            .font(font)
            .foregroundColor(.accentColor)
            .padding()
            .background(
                RoundedRectangle(cornerRadius: 10)
                    .frame(width: imageWidth, height: imageHeight)
                    .foregroundColor(Color(NSColor.textBackgroundColor))
            )
            .overlay(
                RoundedRectangle(cornerRadius: 10)
                    .stroke(Color.blue, lineWidth: 3)
                    .opacity(0.4)
                    .frame(width: imageWidth, height: imageHeight)
            )
            .offset(x: xOffset, y: yOffSet)
            .zIndex(zIndex)
    }
}
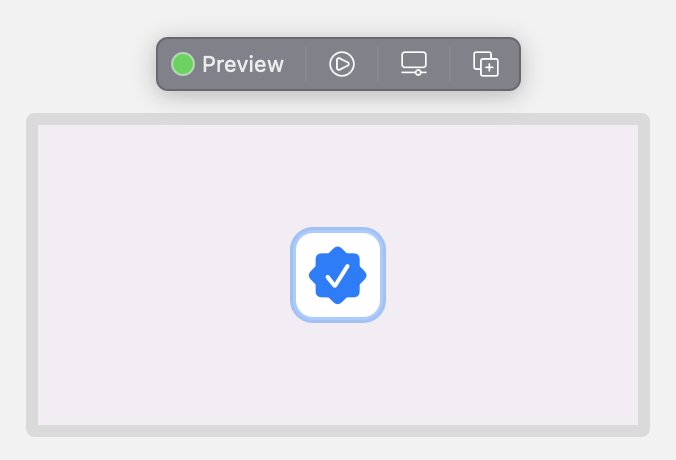
Since we are only passing one single HeroSubImageView in our ContentView, we are back to a single image.
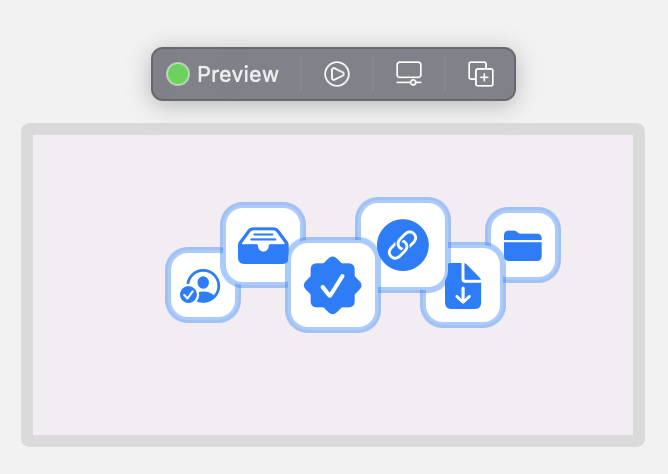
Putting it altogether.
Now that we have our struct, let’s add one for each of our images into our ContentView
struct ContentView: View {
    var body: some View {
        ZStack {
            HeroSubImageView(font: .title2, imageHeight: 35, imageWidth: 35, xOffset: -65, yOffSet: 0, symbolName: "person.crop.circle.badge.checkmark", zIndex: -2)
            HeroSubImageView(font: .title, imageHeight: 40, imageWidth: 40, xOffset: -35, yOffSet: -20, symbolName: "tray.full.fill", zIndex: -1)
            HeroSubImageView(font: .largeTitle, imageHeight: 45, imageWidth: 45, xOffset: 0, yOffSet: 0, symbolName: "checkmark.seal.fill", zIndex: 0)
            HeroSubImageView(font: .largeTitle, imageHeight: 45, imageWidth: 45, xOffset: 35, yOffSet: -20, symbolName: "link.circle.fill", zIndex: -1)
            HeroSubImageView(font: .title, imageHeight: 40, imageWidth: 40, xOffset: 65, yOffSet: 0, symbolName: "arrow.down.doc.fill", zIndex: -2)
            HeroSubImageView(font: .title2, imageHeight: 35, imageWidth: 35, xOffset: 95, yOffSet: -20, symbolName: "folder.fill", zIndex: -3)
        }
        .frame(width: 300, height: 150)
    }
}

struct HeroSubImageView: View {
    var font: Font
    var imageHeight, imageWidth, xOffset, yOffSet: CGFloat
    var symbolName: String
    var zIndex: Double

    var body: some View {
        Image(systemName: symbolName)
            .font(font)
            .foregroundColor(.accentColor)
            .padding()
            .background(
                RoundedRectangle(cornerRadius: 10)
                    .frame(width: imageWidth, height: imageHeight)
                    .foregroundColor(Color(NSColor.textBackgroundColor))
            )
            .overlay(
                RoundedRectangle(cornerRadius: 10)
                    .stroke(Color.blue, lineWidth: 3)
                    .opacity(0.4)
                    .frame(width: imageWidth, height: imageHeight)
            )
            .offset(x: xOffset, y: yOffSet)
            .zIndex(zIndex)
    }
}
We’re in business! Our code has reduced in size and almost all of the code repitition is gone. Again, the hero image is identical to before.
Conclusion
As you can see, SwiftUI is quite powerful. There are lots of great SwiftUI projects being made in the macadmin space but a lot of them are either close sourced or pseudo open source, where the project is free, but the code is hidden. If you are reading this and own one of these projects, I would really encourage you to publish the code. With scripting languages like Bash, Python and Ruby no longer being bundled with macOS, the entire community needs more examples of how to write Swift code.
If you would like to see the entire project, go here
If you would like to see any more examples of SwiftUI, please contact me. Until next time!
Table Of Contents
- Getting started
- Initial SwiftUI code provided by Apple
- Initial Image
- Make Image a little bigger by giving it a built-in font type
- Give the icon some color
- Creating a 40 pixel RoundedRectangle
- Setting the RoundedRectangle color to the text background color
- Moving the RoundedRectangle into the background property of Image
- Create a RoundRectangle overlay onto our Image
- Enabling opacity in the RoundedRectangle overlay
- Creating multiple images
- Initial ZStack
- Creating another struct with variables.
- Putting it altogether.
- Conclusion