Time to get your hands dirty ![]()
In Part 2, you will learn how to create a signing certificate for your packages, sign a basic munki package for deployment and finally create a custom munki package with some defaults.
Introduction
If you are reading this, I am going to make a few assumptions:
- You are already using munki in production or have used munki in the past.
- You have deployed a package in some capacity
- You understand the basics of git
Tools Needed
- An active/paid Apple Developer Account
- MDM with custom
InstallApplication(even if you don’t have this, there’s much to learn) - probuctbuild binary
/usr/bin/productbuild - pkgutil binary
/usr/sbin/pkgutil - Victor’s awesome AppManifest tool.
- Greg’s awesome munkipkg tool.
- Git / Xcode Command Line Tools
- munki code
- Suspicious Package
Obtaining your certificates
Step 1: Creating and downloading your Apple Developer Signing Certificate
-
Login to https://developer.apple.com/account/
-
Under
Certificates, Identifiers & Profiles, selectOS X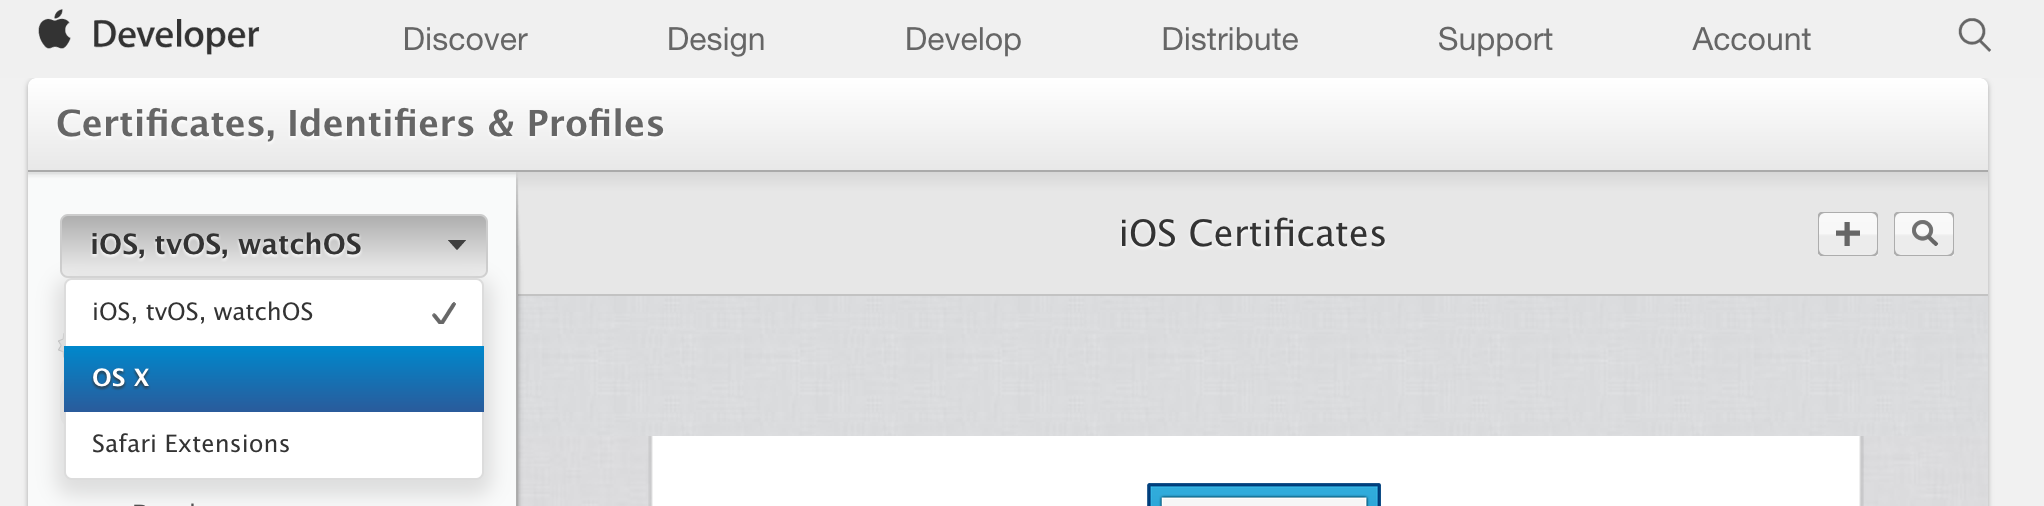
-
Click on the
+sign to begin the process of creating a new certificate.
-
Under Production select
Developer ID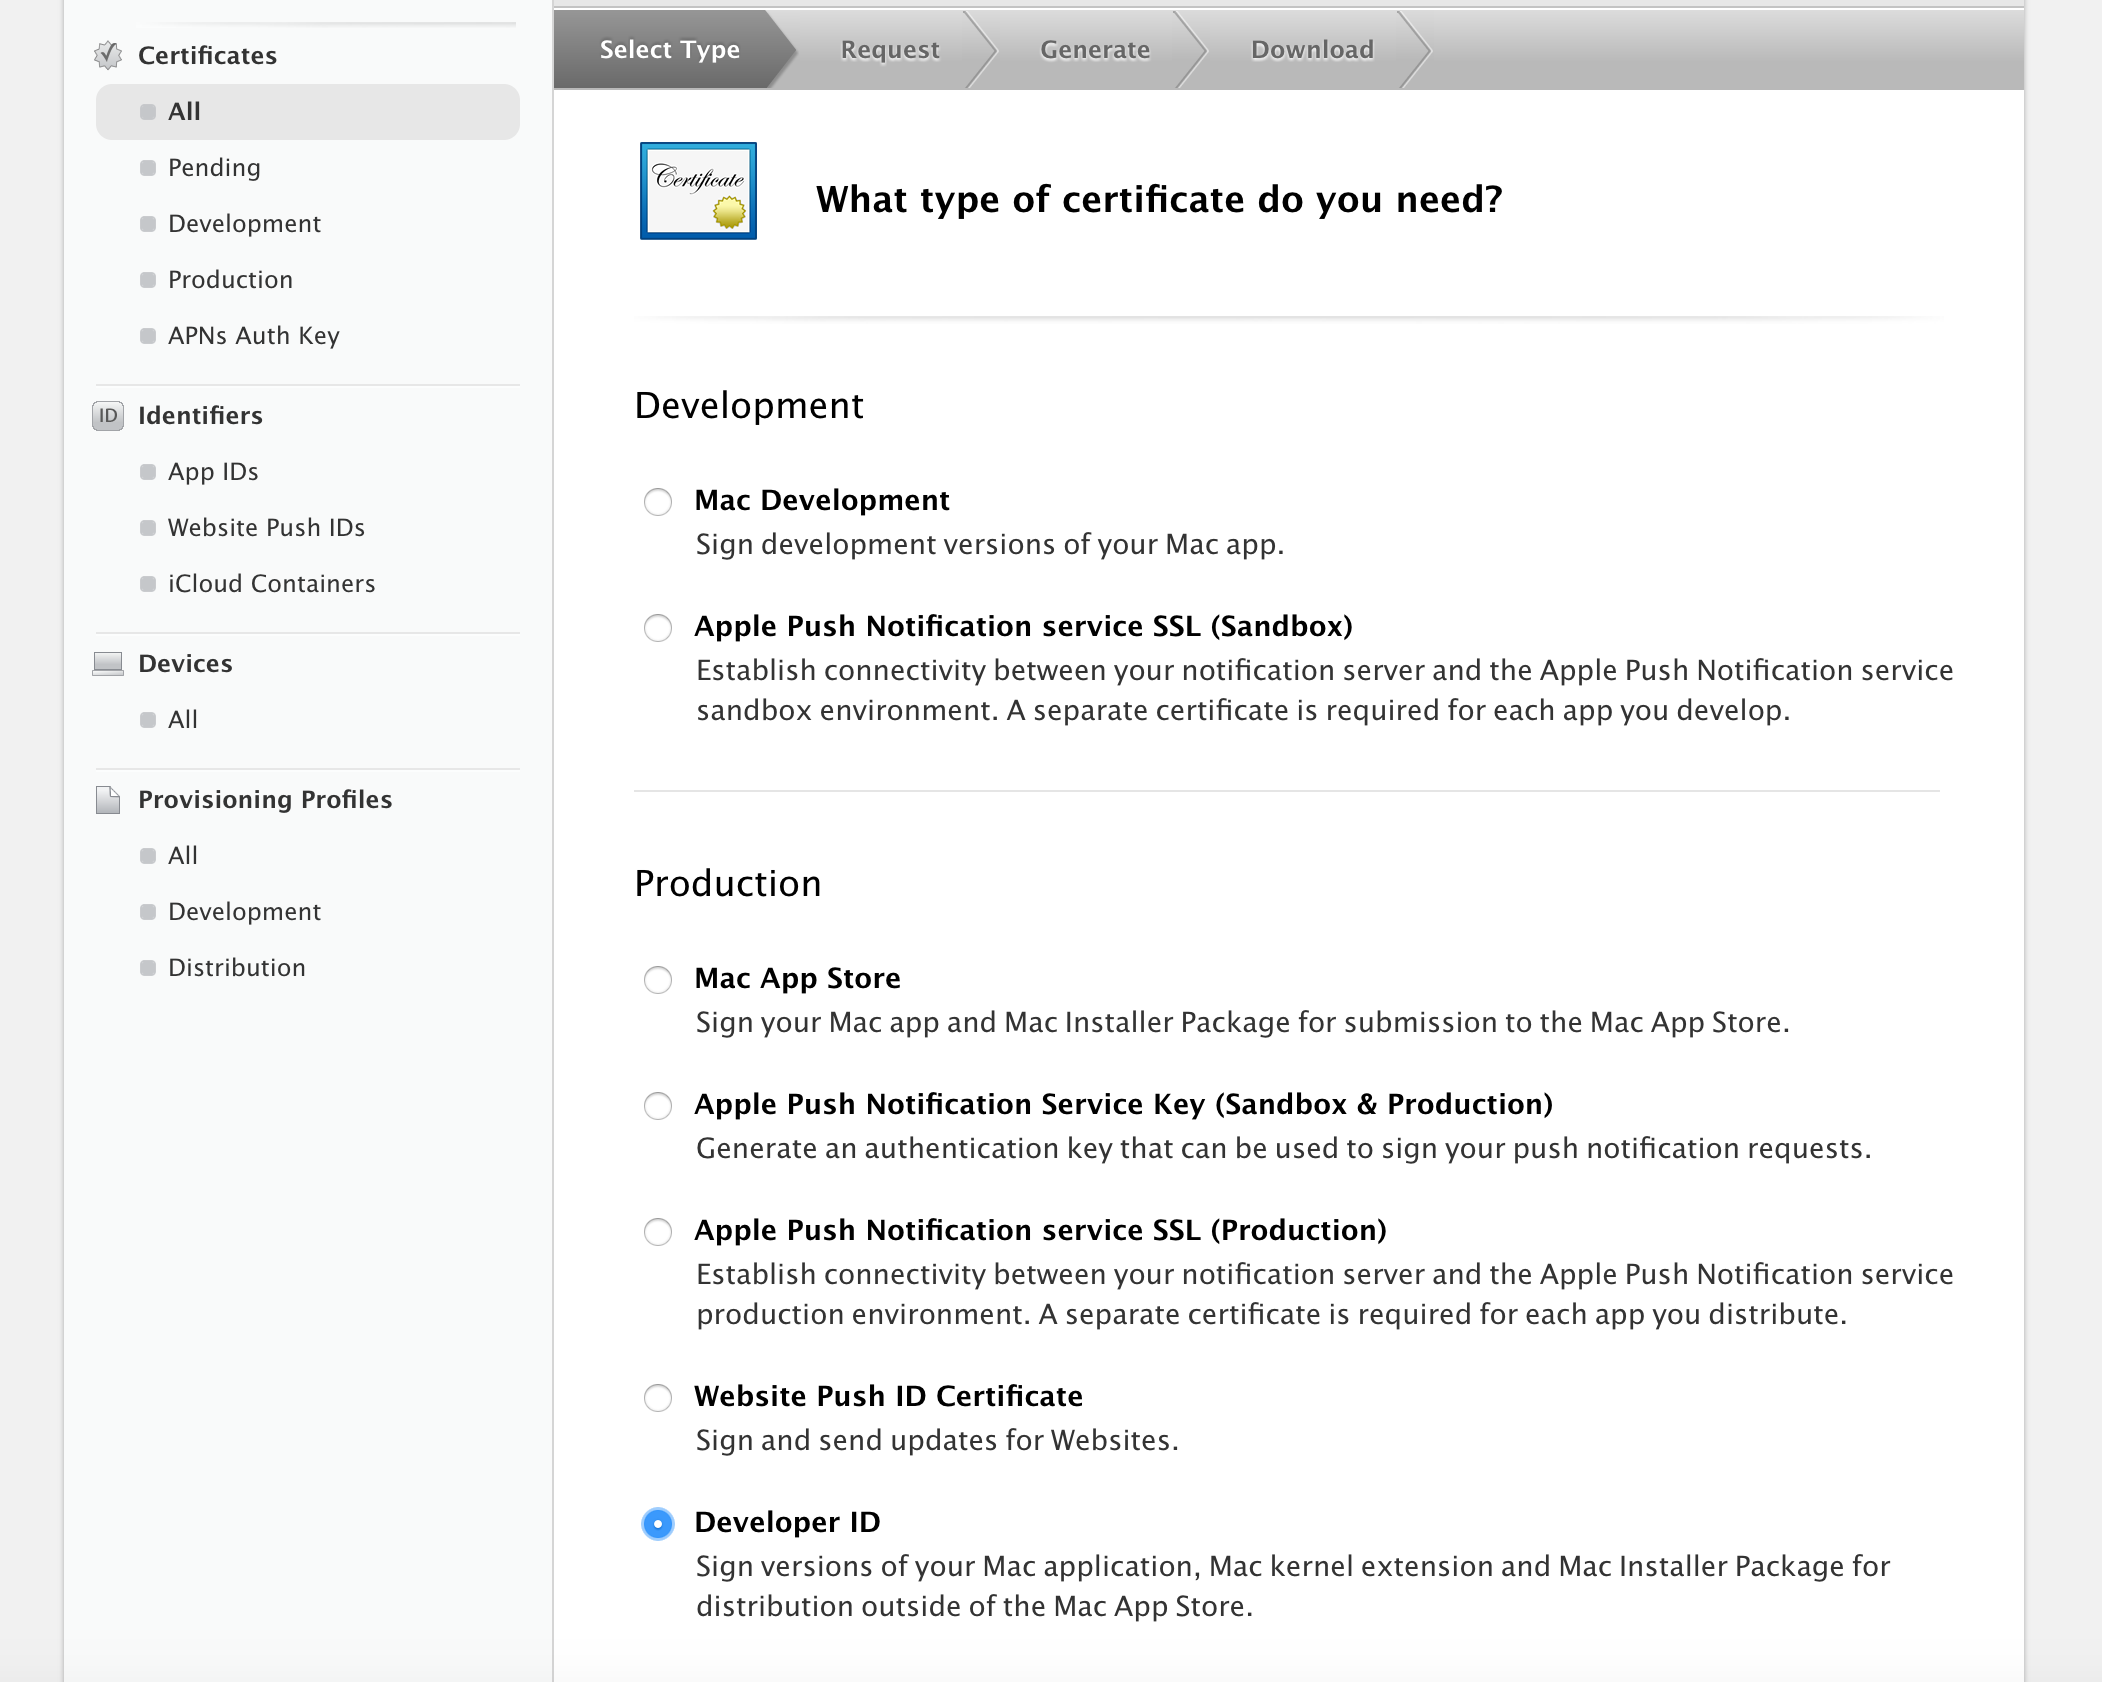
-
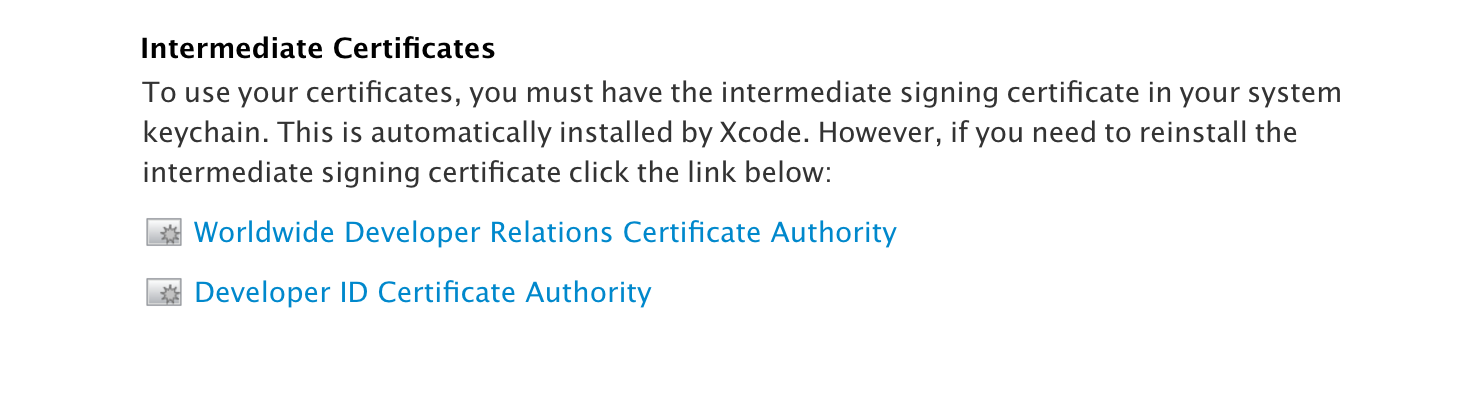
Download the two Apple Developer certificates. These will be used later.
-
Select
Developer ID Installerfor the type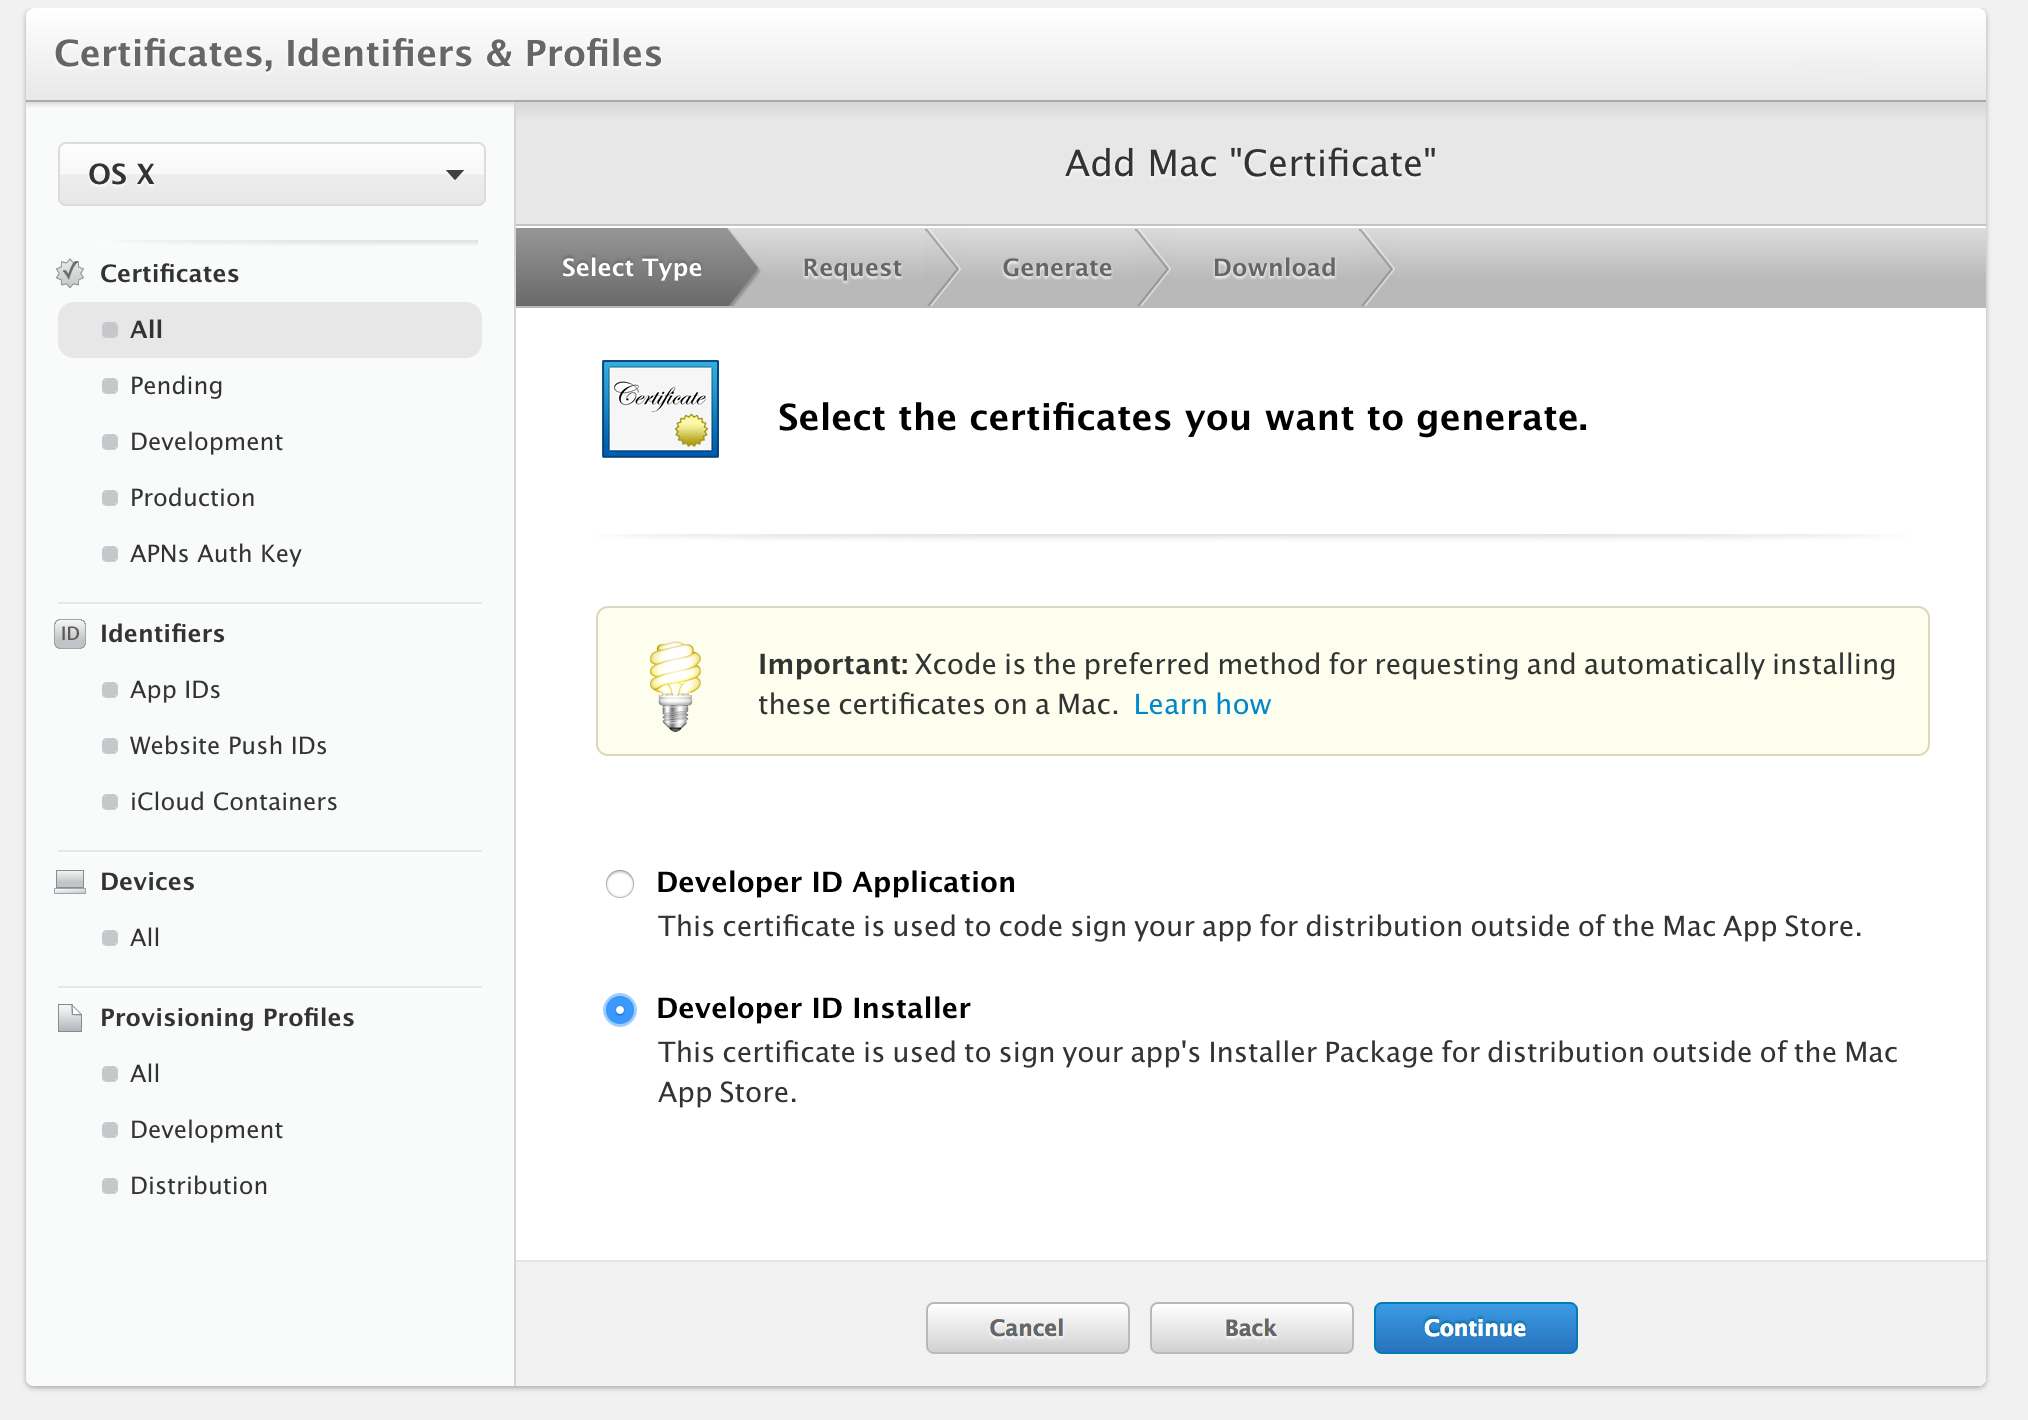
-
You will be asked to generate a CSR
-
Open /Applications/Utilities/Keychain Access.app
-
Under the Menu bar, select
Certificate Assistant->Request a Certificate From a Certificate Authority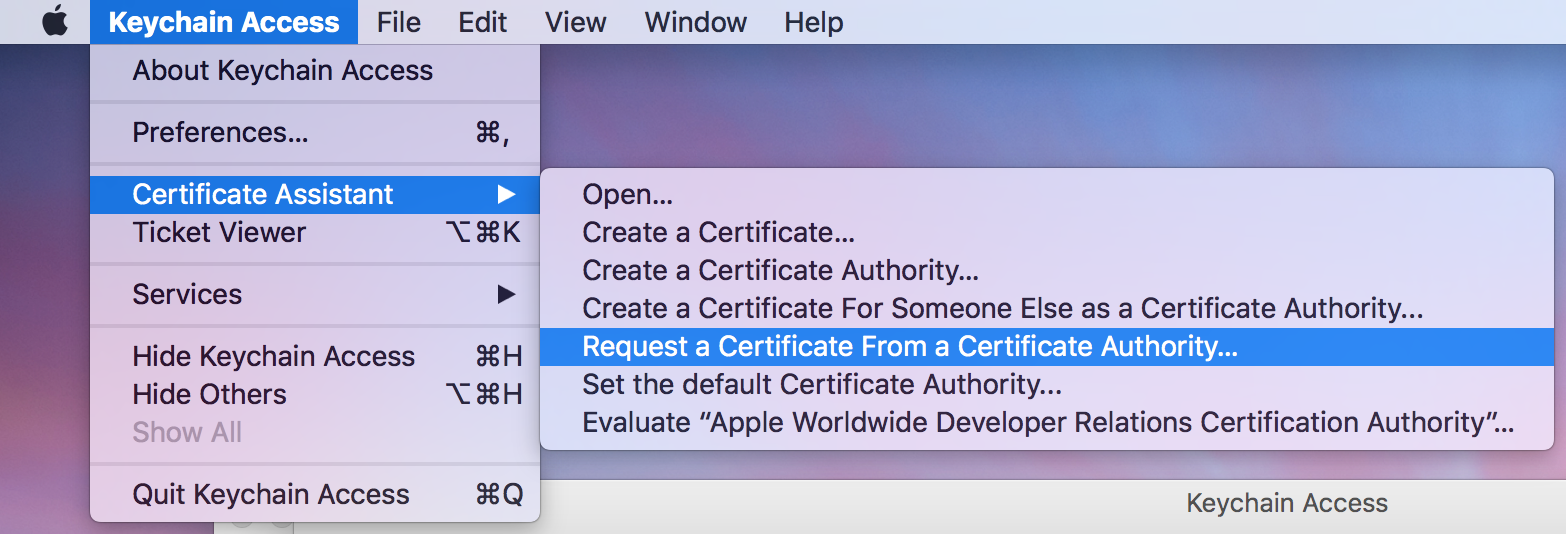
- Fill in the
User Email AddressandCommon Name- User Email Address: [email protected]
-
Common Name: YourCompany - IT DEP Installer
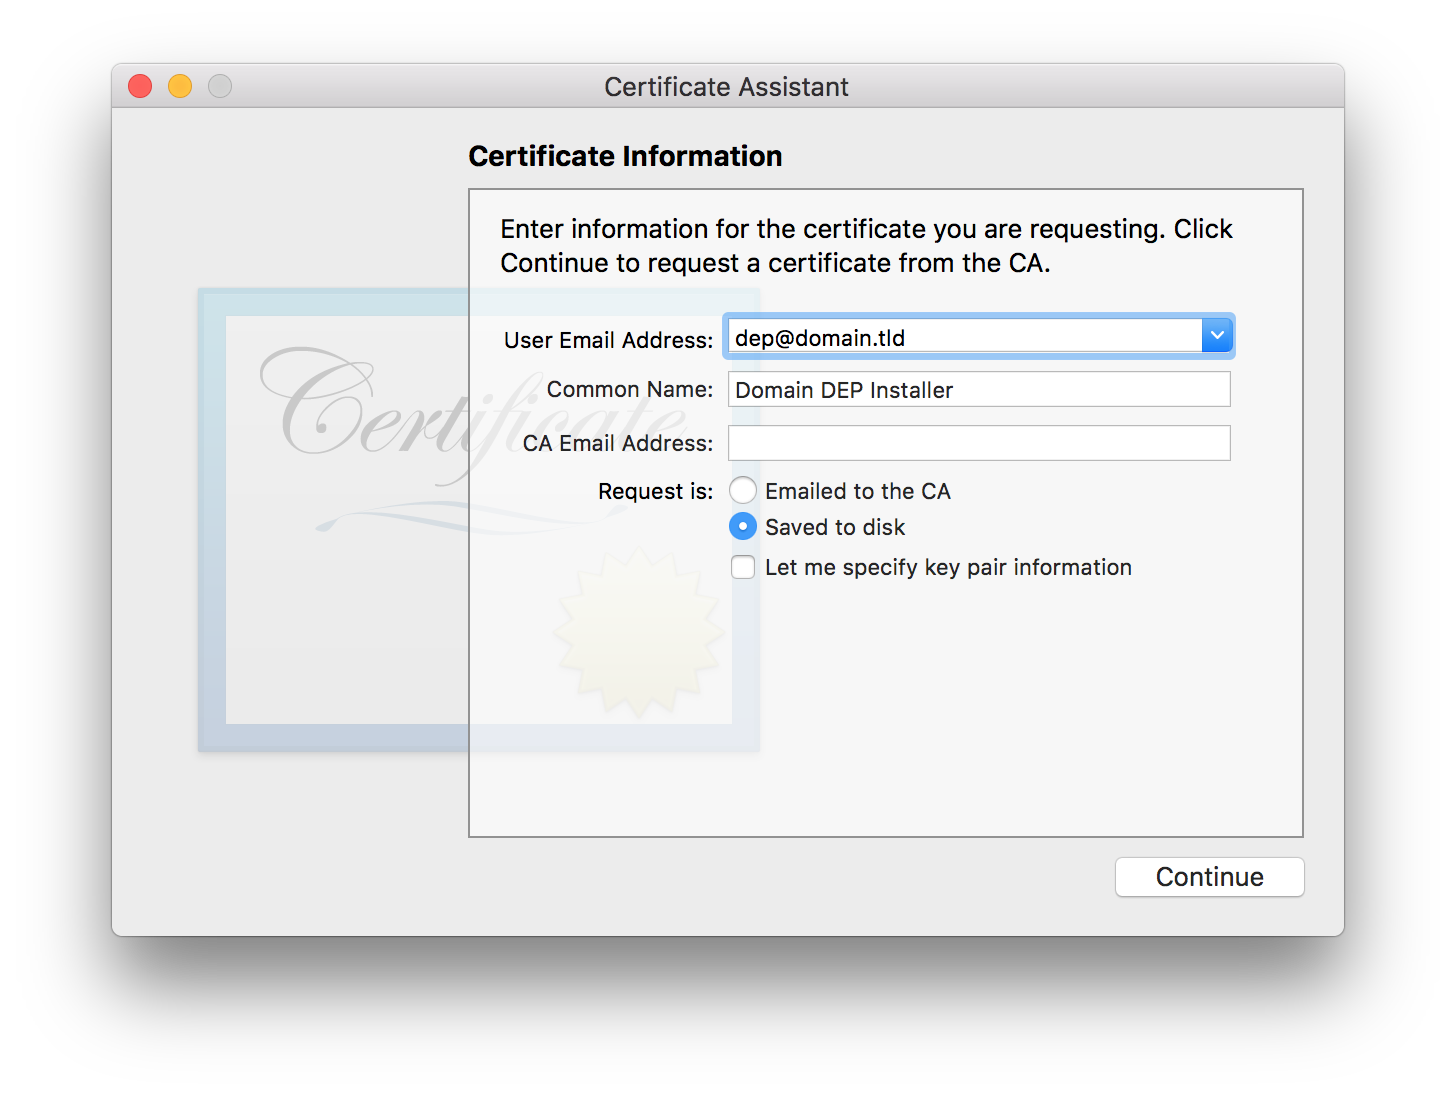
-
Save the CSR to disk.
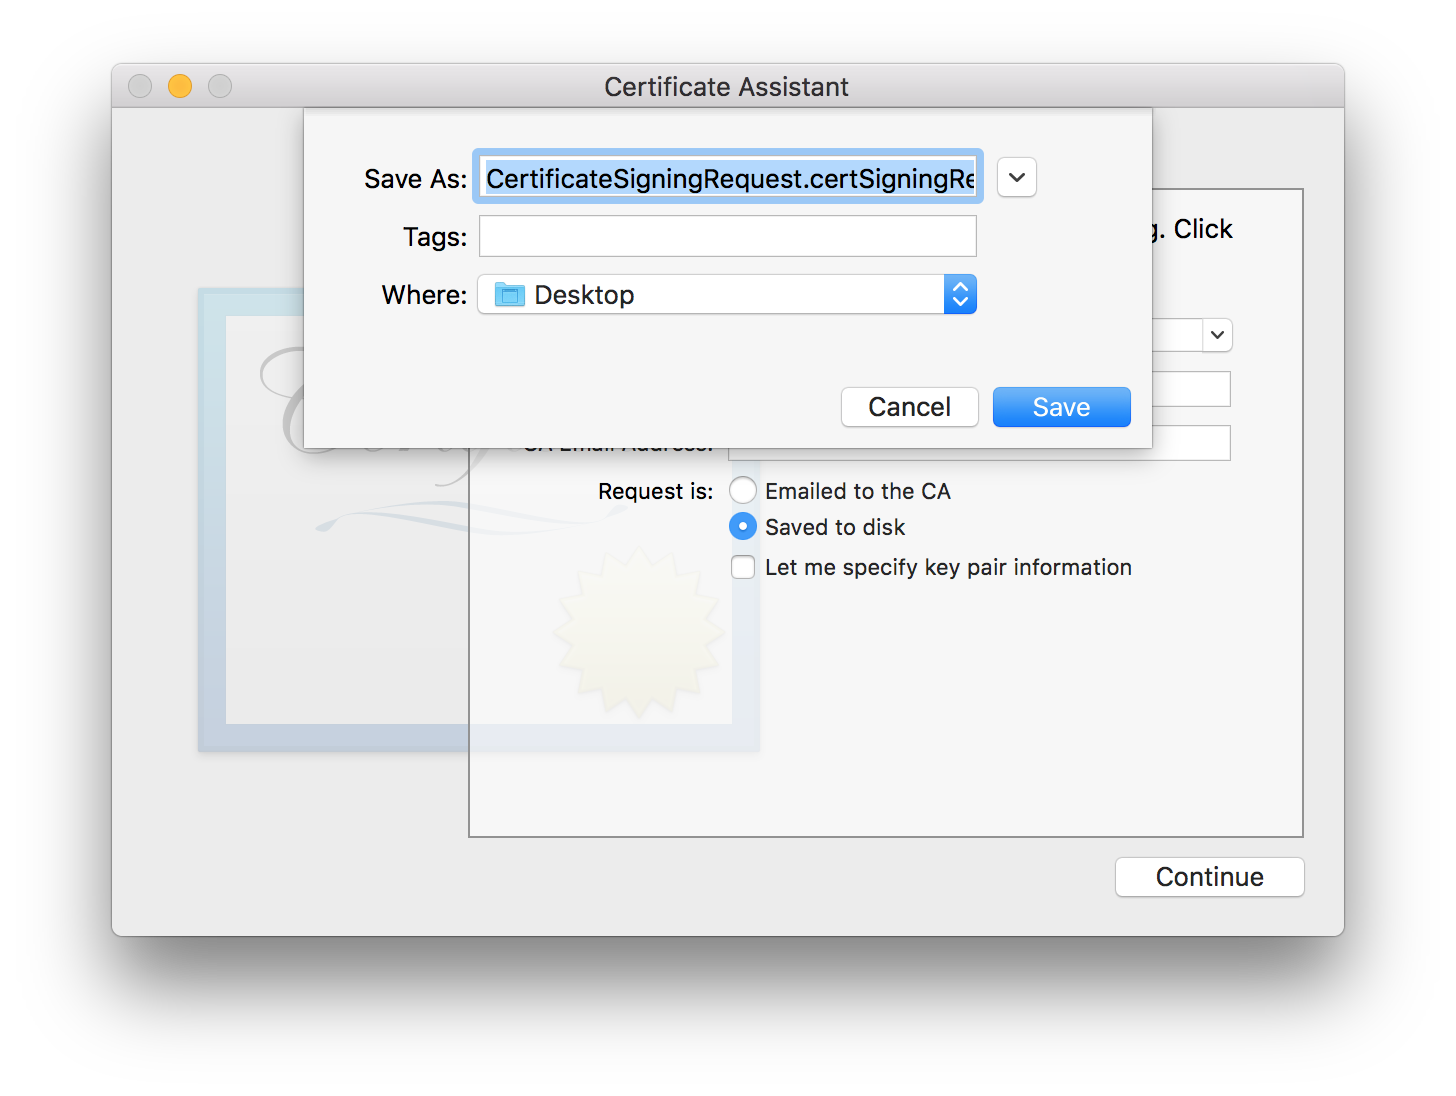
-
Upload the CSR to the Apple Developer Portal
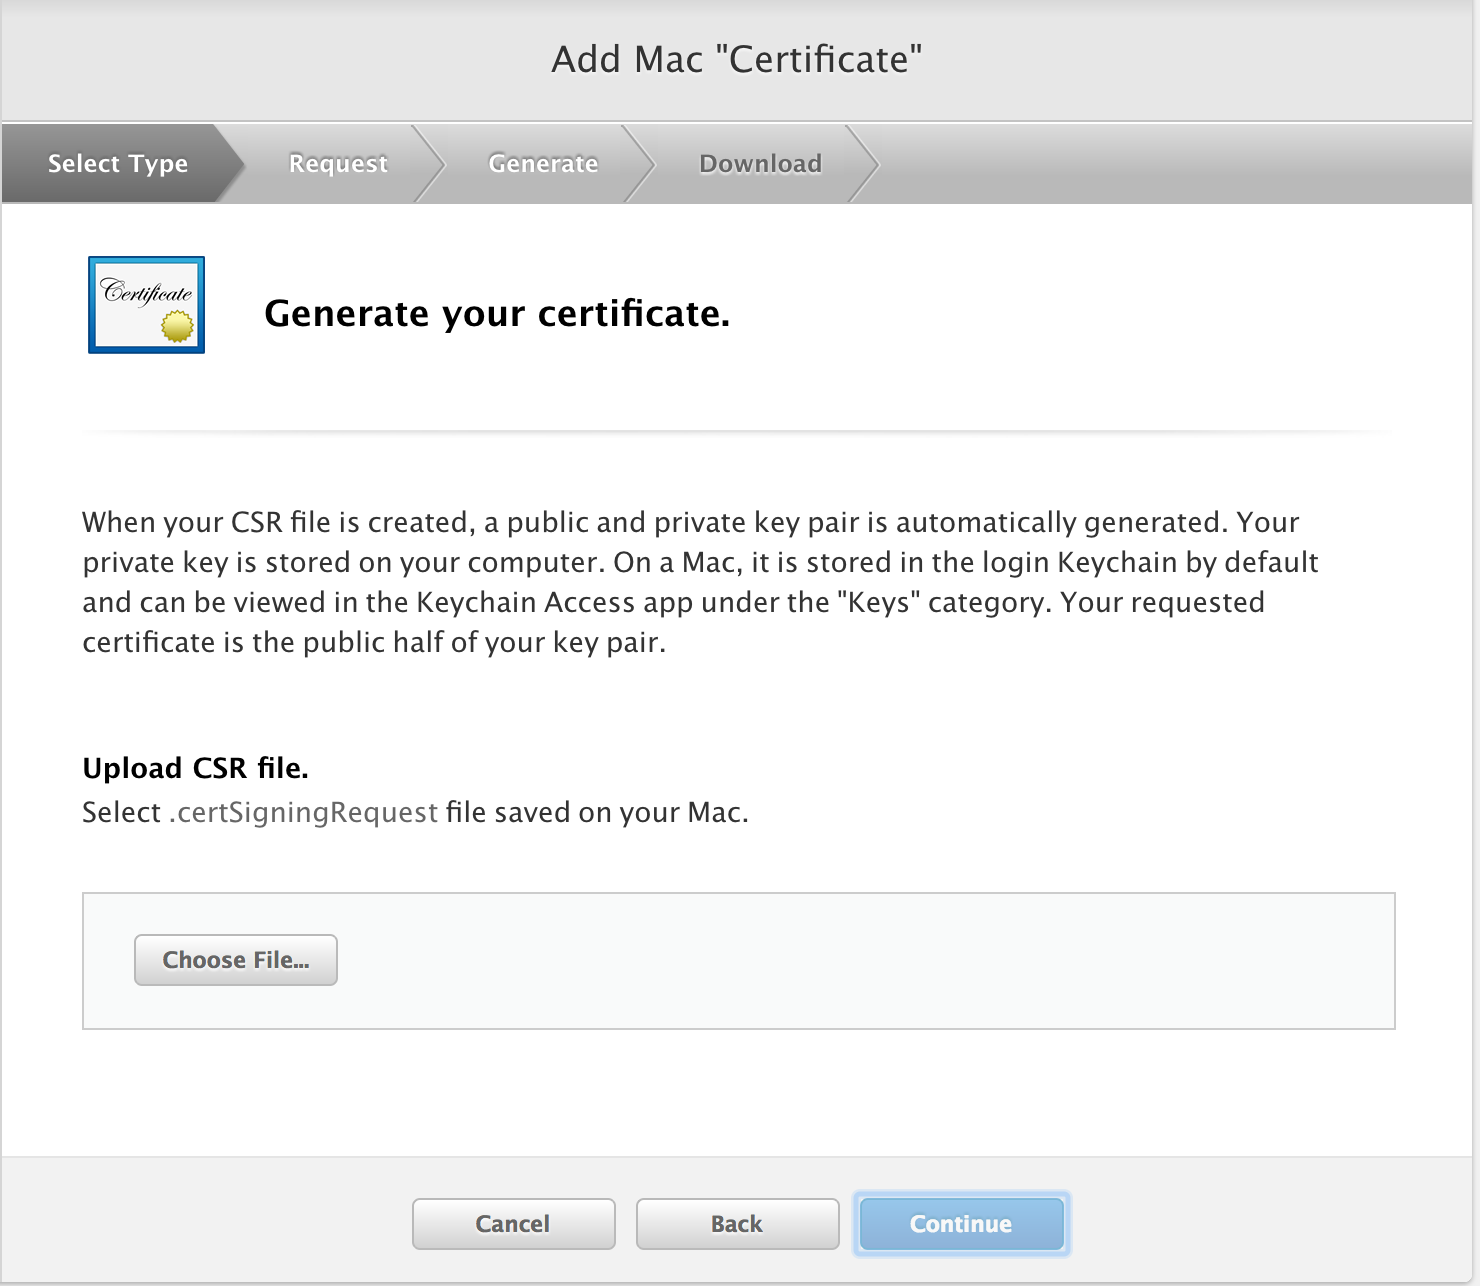
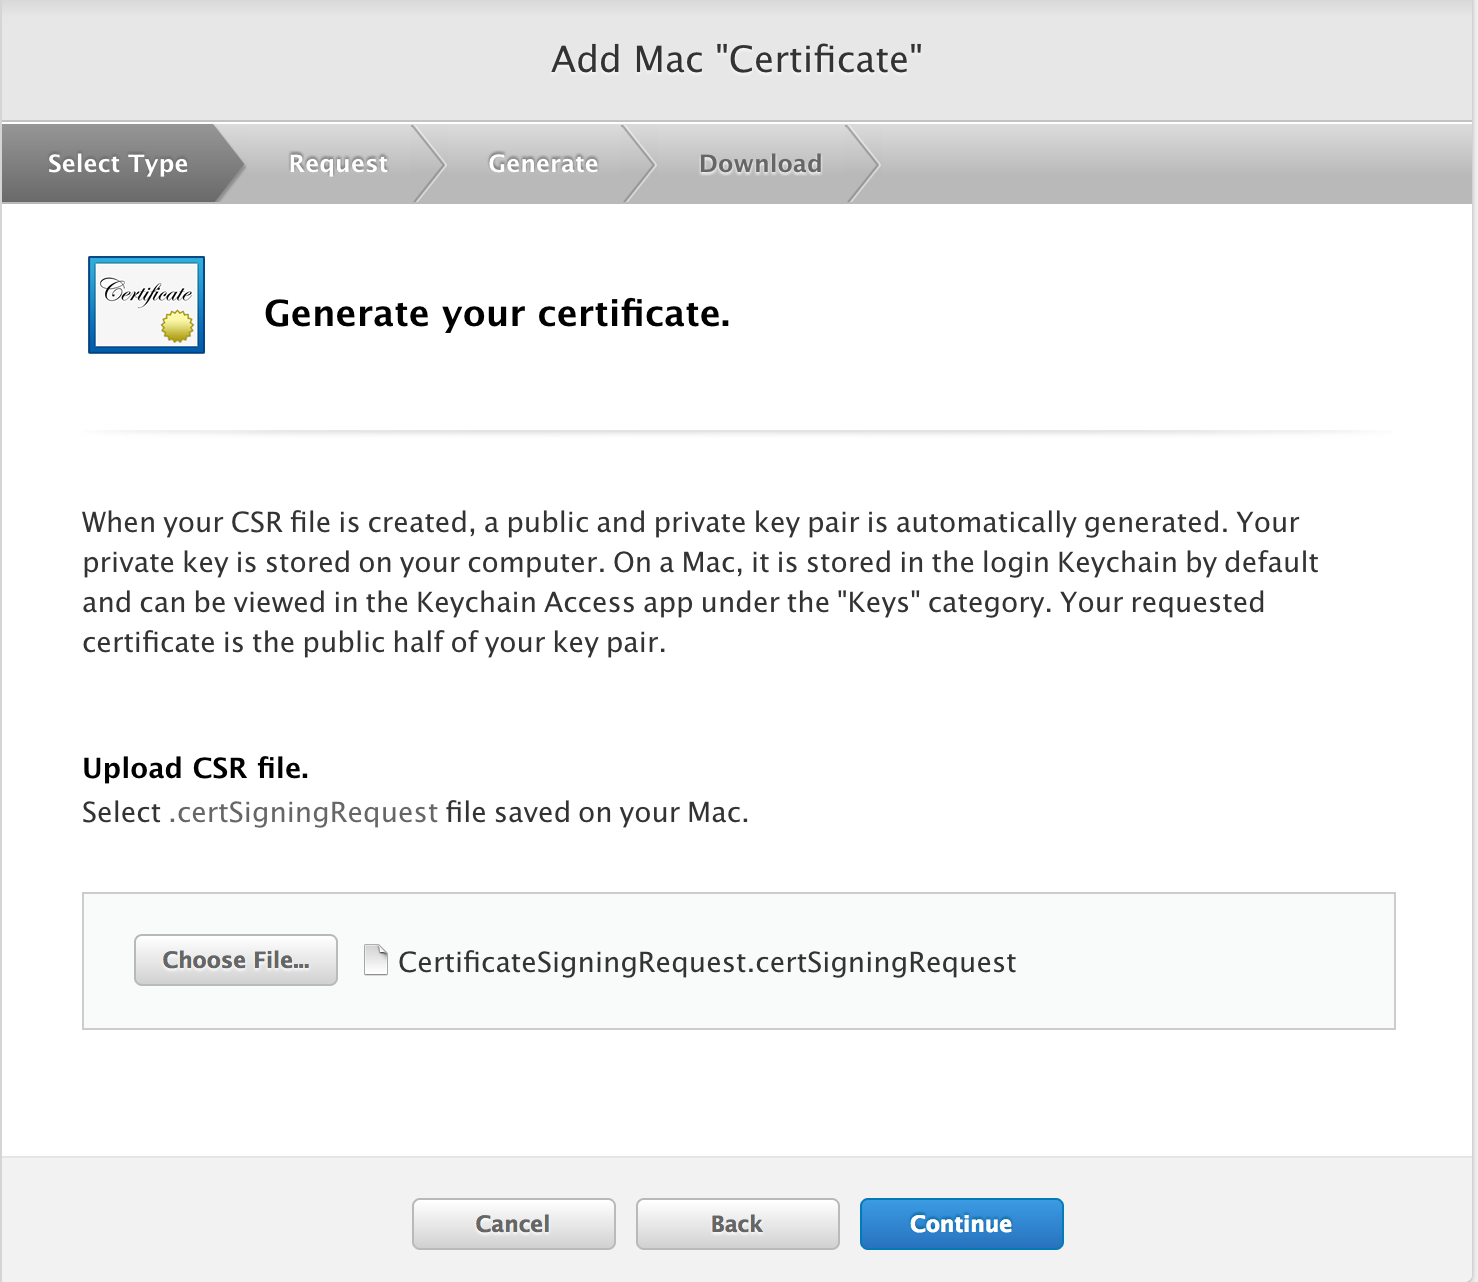
- If done correctly, you should now have access to your signing certificate
Step 2: Installing Signing Certificate and Apple Developer Certificate Authorities
-
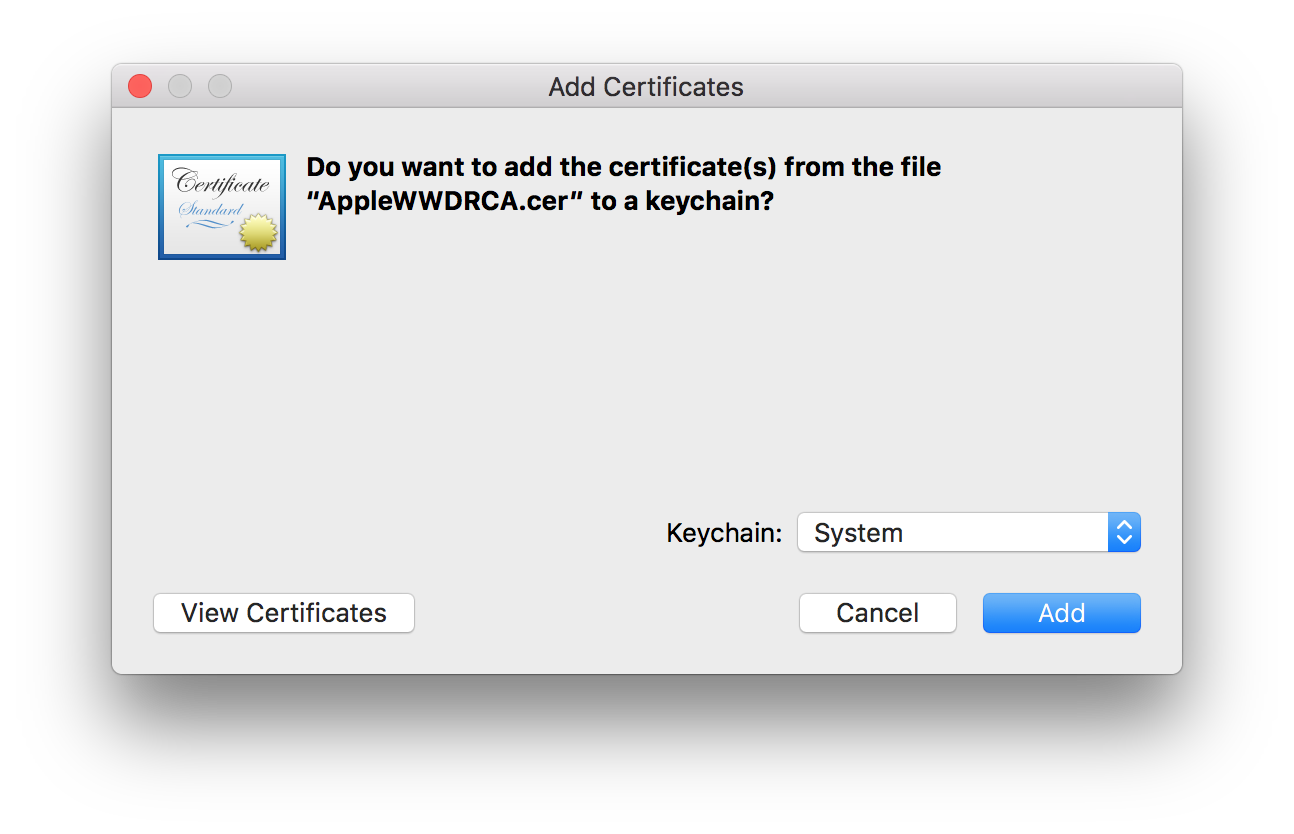
In Keychain Access, Open the
Systemkeychain and selectCertificates - Drag and drop the two Apple Certificate Authorities into the keychain.
- AppleWWDRCA.cer
- DeveloperIDCA.cer
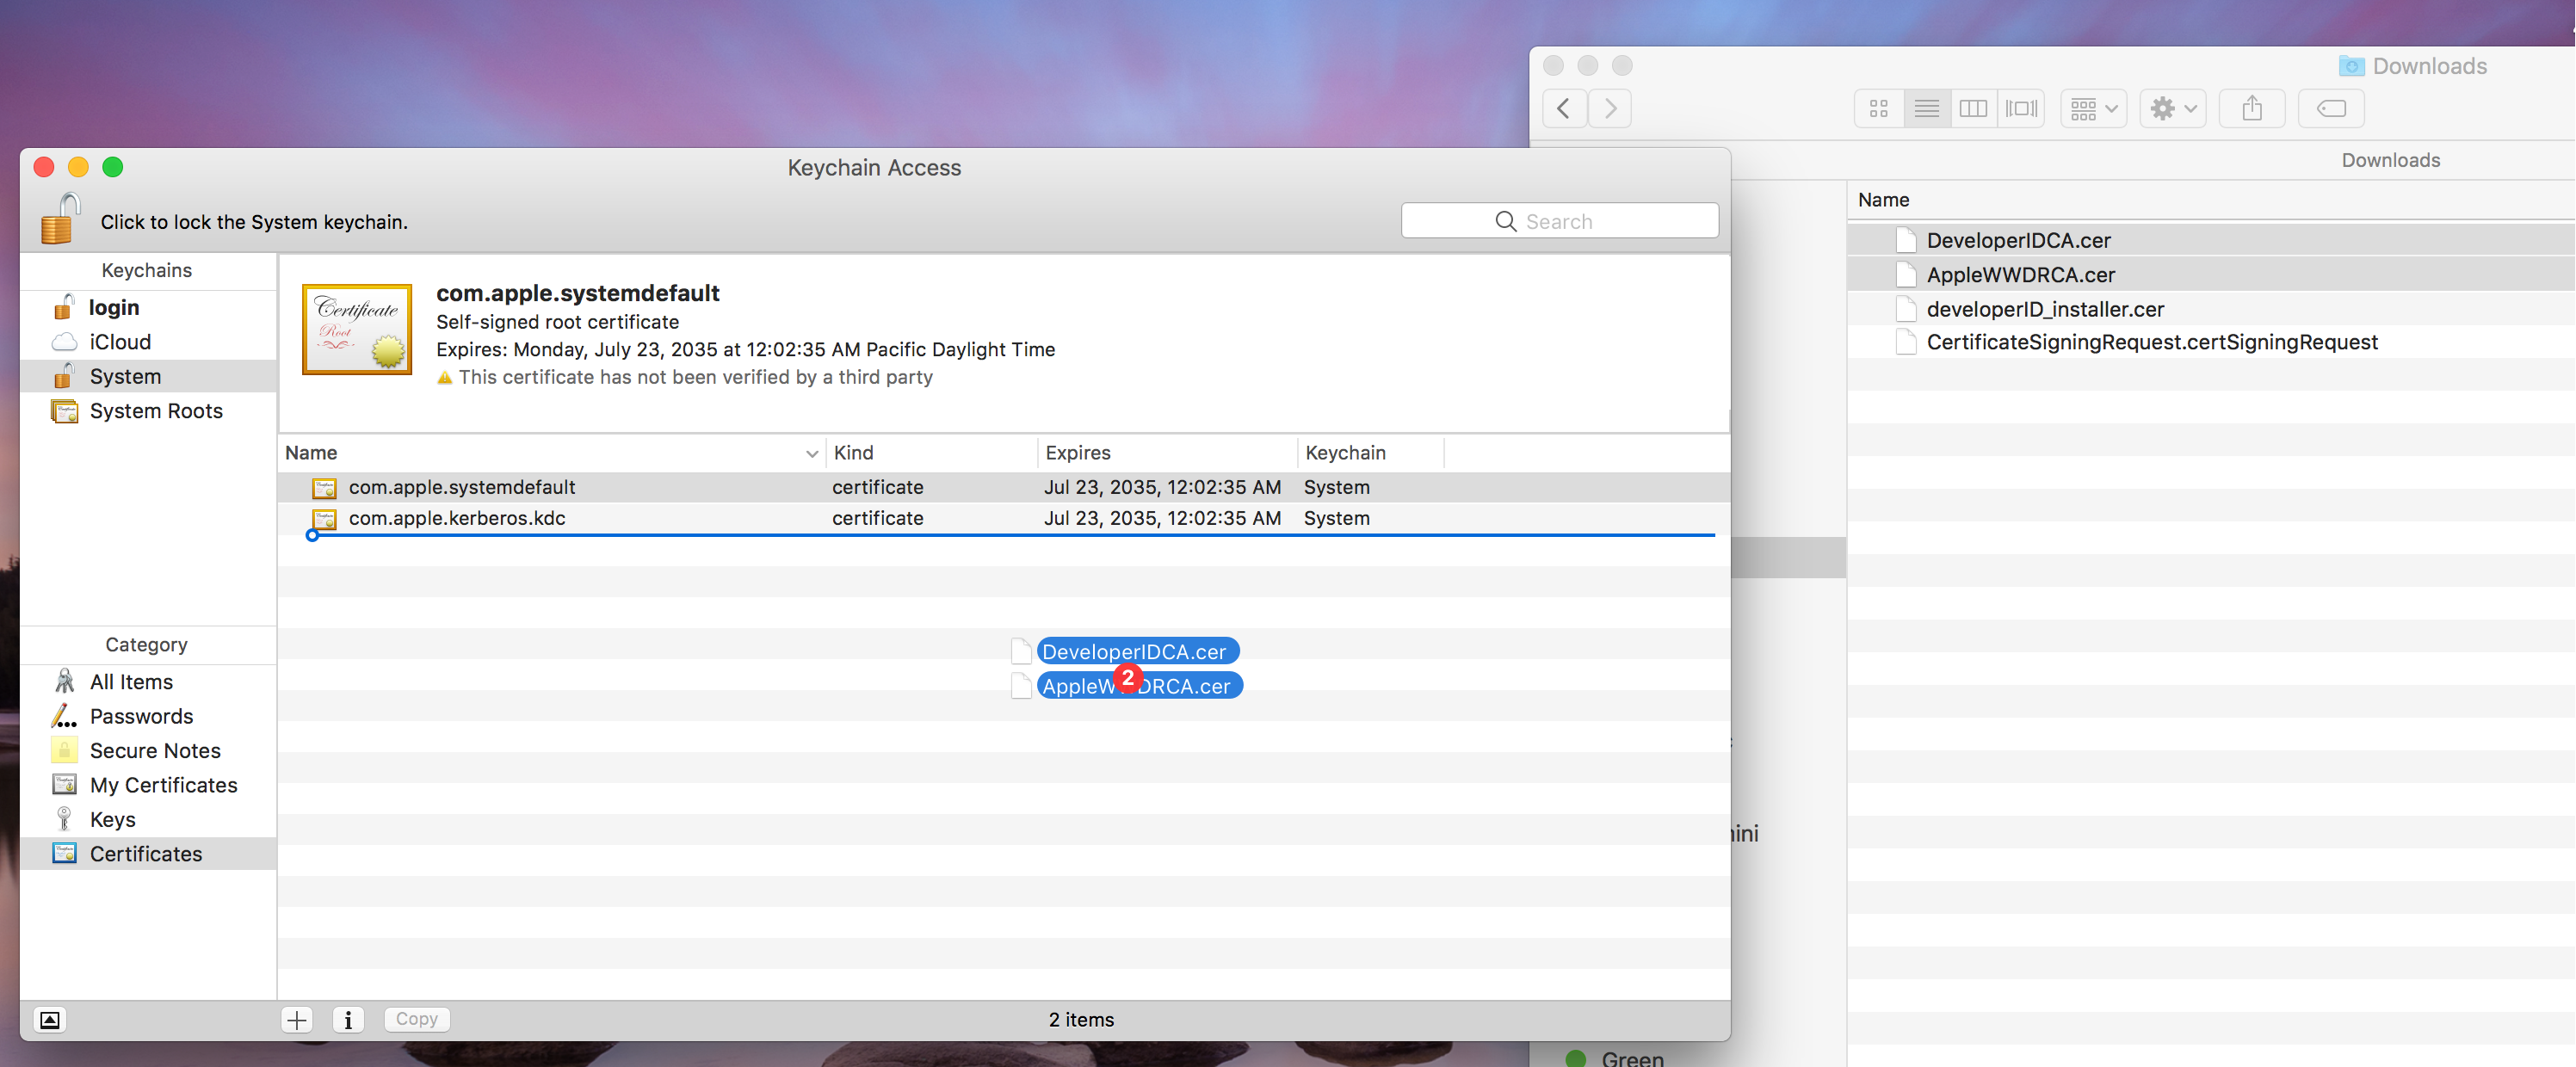
-
You will be asked to validate the installation of the certificates. Accept and authenticate if needed.
-
In Keychain Access, Open the
Loginkeychain and selectCertificates -
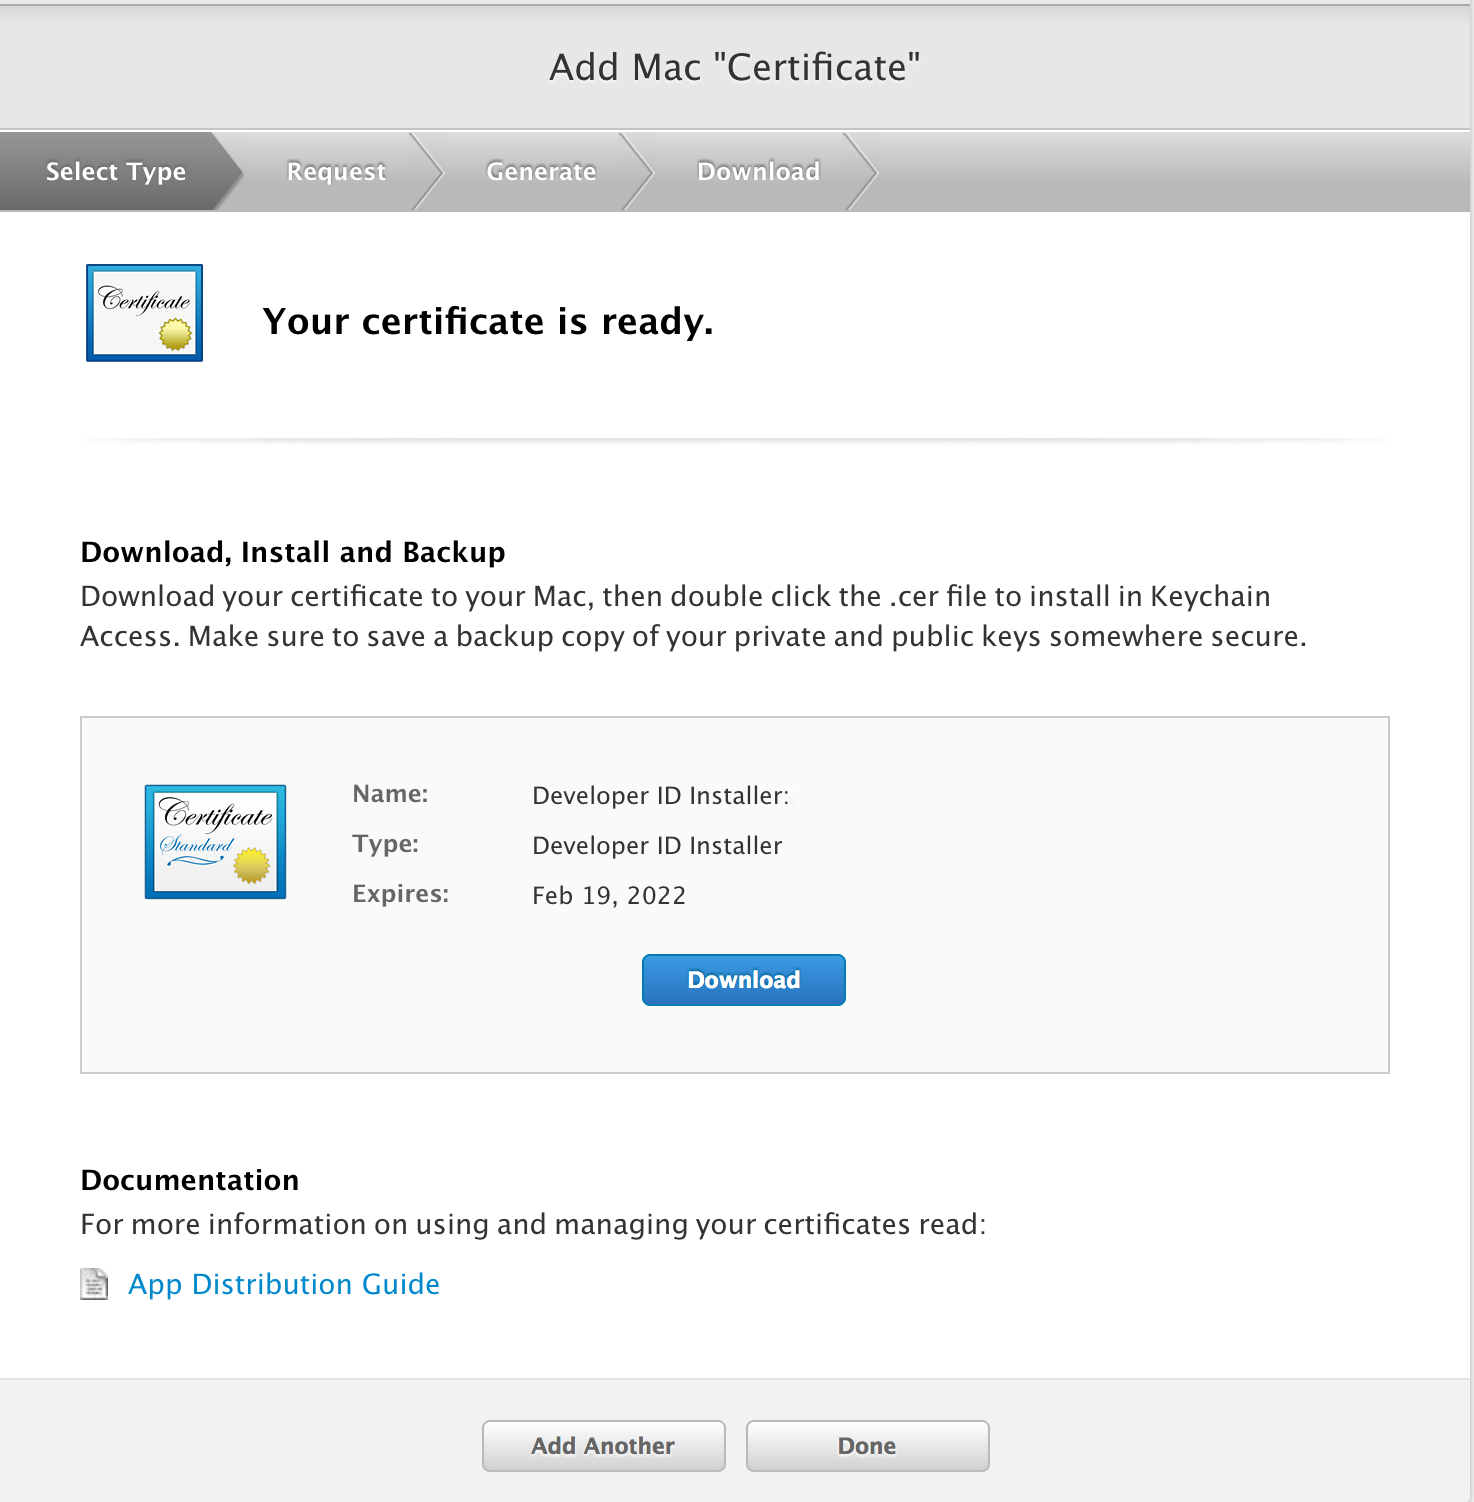
Drag and drop your newly created signing certificate into the keychain. The file should be called
developerID_installer.cer. Validate/authenticate the installation if needed. -
If done correctly, you should now see both the public and private key of your Developer certificate.
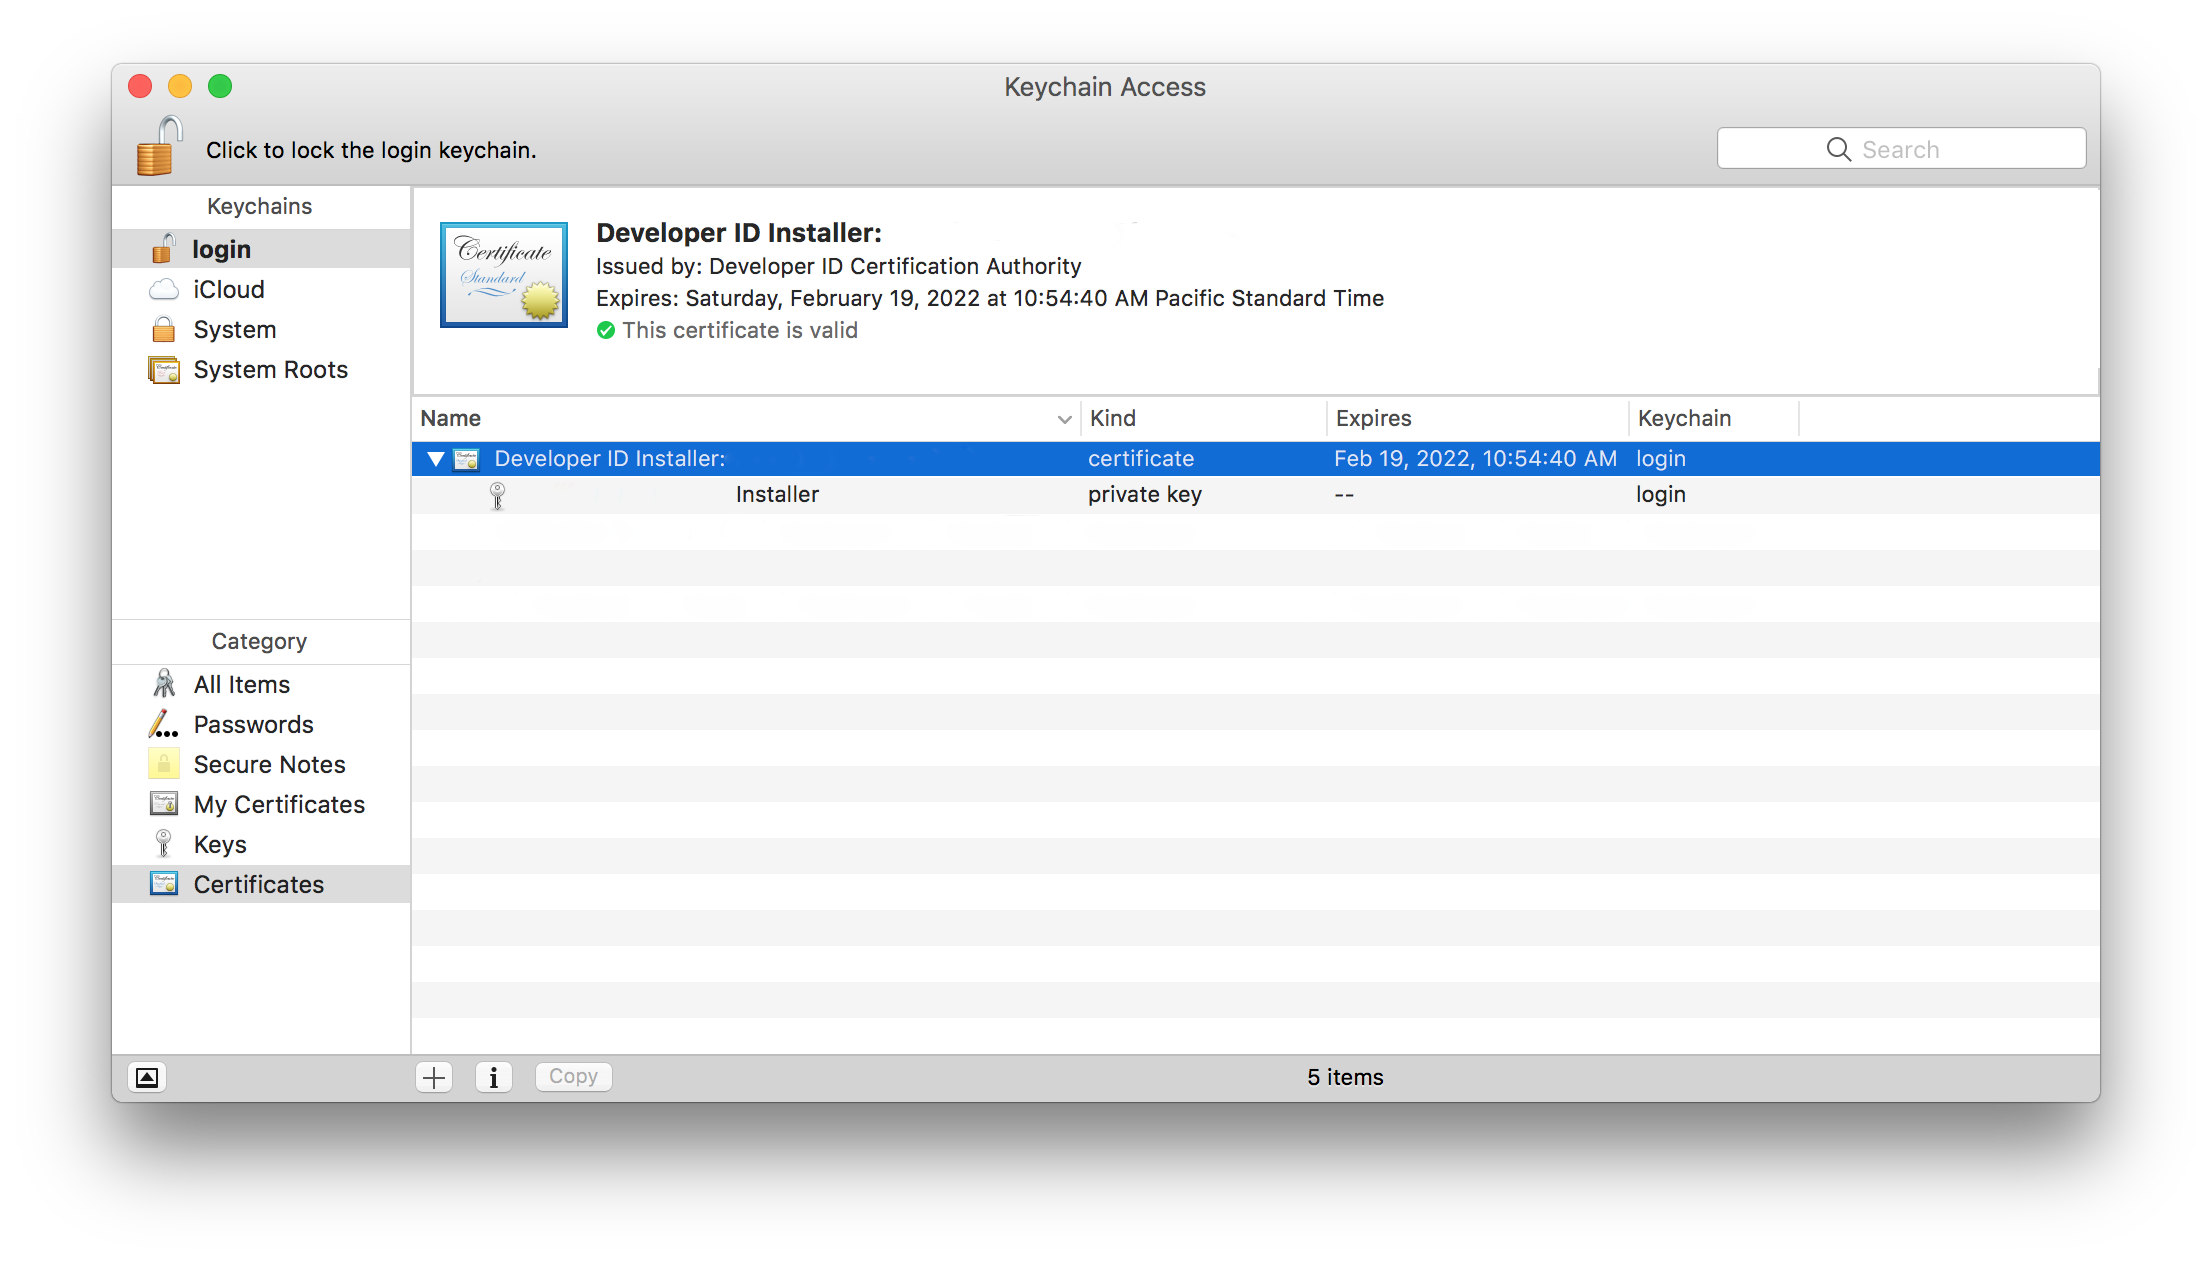
- Write down the name of your Certificate as this will be used later. It will be in the form of
Developer ID Installer: Name (Identifier)
Munki - Standard Deployment
Creating the Package
-
Open up terminal.
- Create a working directory.
mkdir -p ~/DEP
- Inside of the working directory, clone the munki repository via git.
cd ~/DEPgit clone https://github.com/munki/munki.git
- Go to the newly create munki directory.
cd ./munki
- Run the new make_munki_mpkg_DEP script with the
-sflag. You will pass your developer certificate as a string. This requires elevated permissions to run.sudo ./code/tools/make_munki_mpkg_DEP.sh -s "Developer ID Installer: Example (R9UM25C6B5)"
If everything goes right you should see the following in Terminal:
productbuild: Using timestamp authority for signature
productbuild: Signing product with identity "Developer ID Installer: Example (R9UM25C6B5)" from keychain /Users/Example/Library/Keychains/login.keychain-db
productbuild: Adding certificate "Developer ID Certification Authority"
productbuild: Adding certificate "Apple Root CA"
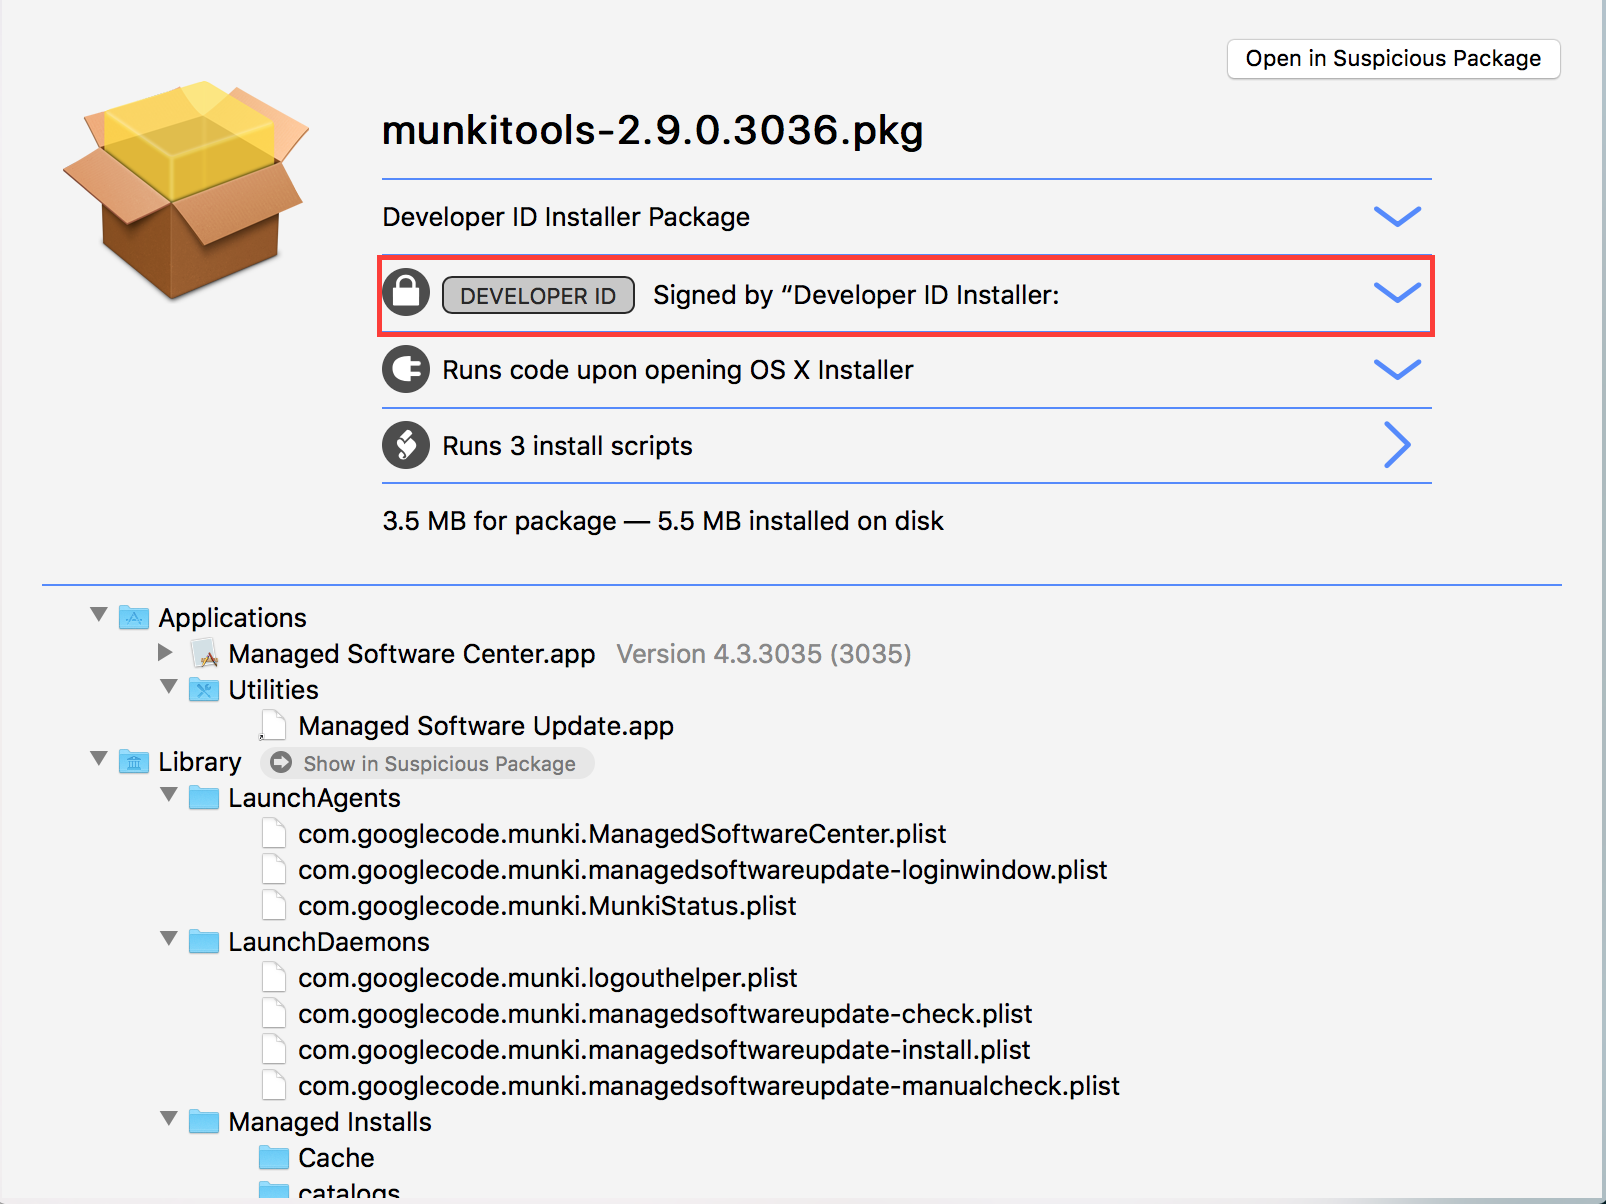
productbuild: Wrote product to /Users/Example/DEP/munki/munkitools-2.9.0.3036.pkg
Distribution package created at /Users/Example/DEP/munki/munkitools-2.9.0.3036.pkg.
Removing temporary files...
Done.
You can validate this with Suspicious Package
Great. So now you have a signed munki package with your developer certificate, but in order to utilize InstallApplication you must create a Manifest.plist that tells your MDM how to install the package.
Depending on your vendor, this process may be automated, but for demonstration purposes, we will use Victor’s appmanifest tool.
Creating the Manifest.plist
-
Using a browser, download appmanifest. Save this to the root of your working DEP folder.
- In Terminal, go back to your root DEP folder
cd ~/DEP
- Mark the Appmanifest binary as executable
chmod a+x ./appmanifest
- Run appmanifest and point it to your newly created munki package.
./appmanifest ./munki/munkitools-2.9.0.3036.pkg- appmanifest should print out an XML file:
- You can directly write your file:
./appmanifest ./munki/munkitools-2.9.0.3036.pkg > ./Manifest.plist
The appmanifest binary will write a url key. This is where you can specify the https:// url that your package will be located. Depending on your vendor, this process may be automated or you will be able to upload this file yourself, but for demonstration purposes, we will fill it in with an example url.
<?xml version="1.0" encoding="UTF-8"?>
<!DOCTYPE plist PUBLIC "-//Apple//DTD PLIST 1.0//EN" "http://www.apple.com/DTDs/PropertyList-1.0.dtd">
<plist version="1.0">
  <dict>
    <key>items</key>
    <array>
      <dict>
        <key>assets</key>
        <array>
          <dict>
            <key>kind</key>
            <string>software-package</string>
            <key>md5-size</key>
            <integer>3504665</integer>
            <key>md5s</key>
            <array>
              <string>1bc81e222249e0df2017dcae71e4123a</string>
            </array>
            <key>url</key>
            <string>https://yourmdmurl.tld/packages/munkitools-2.9.0.3036.pkg</string>
          </dict>
        </array>
      </dict>
    </array>
  </dict>
</plist>
Now that you have your signed package and corresponding manifest.plist, you can now deploy munki via your MDM server!
Let’s look at that process now (below is a video, not a picture).
If you pay close attention, as the device was scrolling down the /Applications list, Managed Software Center finished installing.
And this is great as a Proof of Concept, but what if you actually need to configure some defaults for Munki (say https)?
Munki - Custom Deployment
For this next example, we are going to do the following:
- Expand our munkitools-2.9.0.3036.pkg Distribution package
- We are going to create a simple flat package with munkipkg that will use the
defaultscommand to set our url - recreate the package, inserting our new package.
Expanding our signed distribution package
- In Terminal, go back to your root DEP folder
cd ~/DEP
- Expand the munkitools package.
/usr/sbin/pkgutil --expand ./munki/munkitools-2.9.0.3036.pkg ./munkiextracted
- Rename the expanded munkitools packages.
mv ./munkiextracted/munkitools_admin-2.9.0.3036.pkg ./munkiextracted/munkitools_admin-2.9.0.3036_extracted.pkgmv ./munkiextracted/munkitools_app-4.3.3035.pkg ./munkiextracted/munkitools_app-4.3.3035_extracted.pkgmv ./munkiextracted/munkitools_core-2.9.0.3036.pkg ./munkiextracted/munkitools_core-2.9.0.3036_extracted.pkgmv ./munkiextracted/munkitools_launchd-2.0.0.3019.pkg ./munkiextracted/munkitools_launchd-2.0.0.3019_extracted.pkg
- Reflatten each munkitools package
/usr/sbin/pkgutil --flatten ./munkiextracted/munkitools_admin-2.9.0.3036_extracted.pkg ./munkiextracted/munkitools_admin-2.9.0.3036.pkg/usr/sbin/pkgutil --flatten ./munkiextracted/munkitools_app-4.3.3035_extracted.pkg ./munkiextracted/munkitools_app-4.3.3035.pkg/usr/sbin/pkgutil --flatten ./munkiextracted/munkitools_core-2.9.0.3036_extracted.pkg ./munkiextracted/munkitools_core-2.9.0.3036.pkg/usr/sbin/pkgutil --flatten ./munkiextracted/munkitools_launchd-2.0.0.3019_extracted.pkg ./munkiextracted/munkitools_launchd-2.0.0.3019.pkg
- Delete the old extracted packages
rm -rf /munkiextracted/munkitools_admin-2.9.0.3036_extracted.pkgrm -rf ./munkiextracted/munkitools_app-4.3.3035_extracted.pkgrm -rf ./munkiextracted/munkitools_core-2.9.0.3036_extracted.pkgrm -rf ./munkiextracted/munkitools_launchd-2.0.0.3019_extracted.pkg
Creating a postinstall pkg with munkipkg
- Inside of the working directory, clone the munkipkg repository via git.
git clone https://github.com/munki/munki-pkg.git
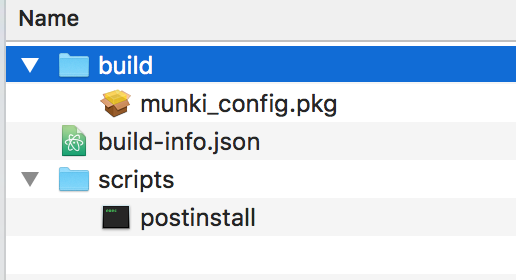
- Create a new munkipkg sub directory and scripts directory
mkdir -p ./munki-pkg/munki_config/scripts
- Copy the build-info.json from
munki_kickstartcp ./munki-pkg/munki_kickstart/build-info.json ./munki-pkg/munki_config
- Using your text editor of choice (Atom, TextWrangler, vi, nano) configure the project’s
identifier,name, but most importantly, changedistribution_stylefrom true to false.{ "ownership": "recommended", "suppress_bundle_relocation": true, "identifier": "com.github.munki.pkg.munki_config", "postinstall_action": "none", "distribution_style": false, "version": "1.0", "name": "munki_config.pkg", "install_location": "/" }- You cannot have nested distribution packages!
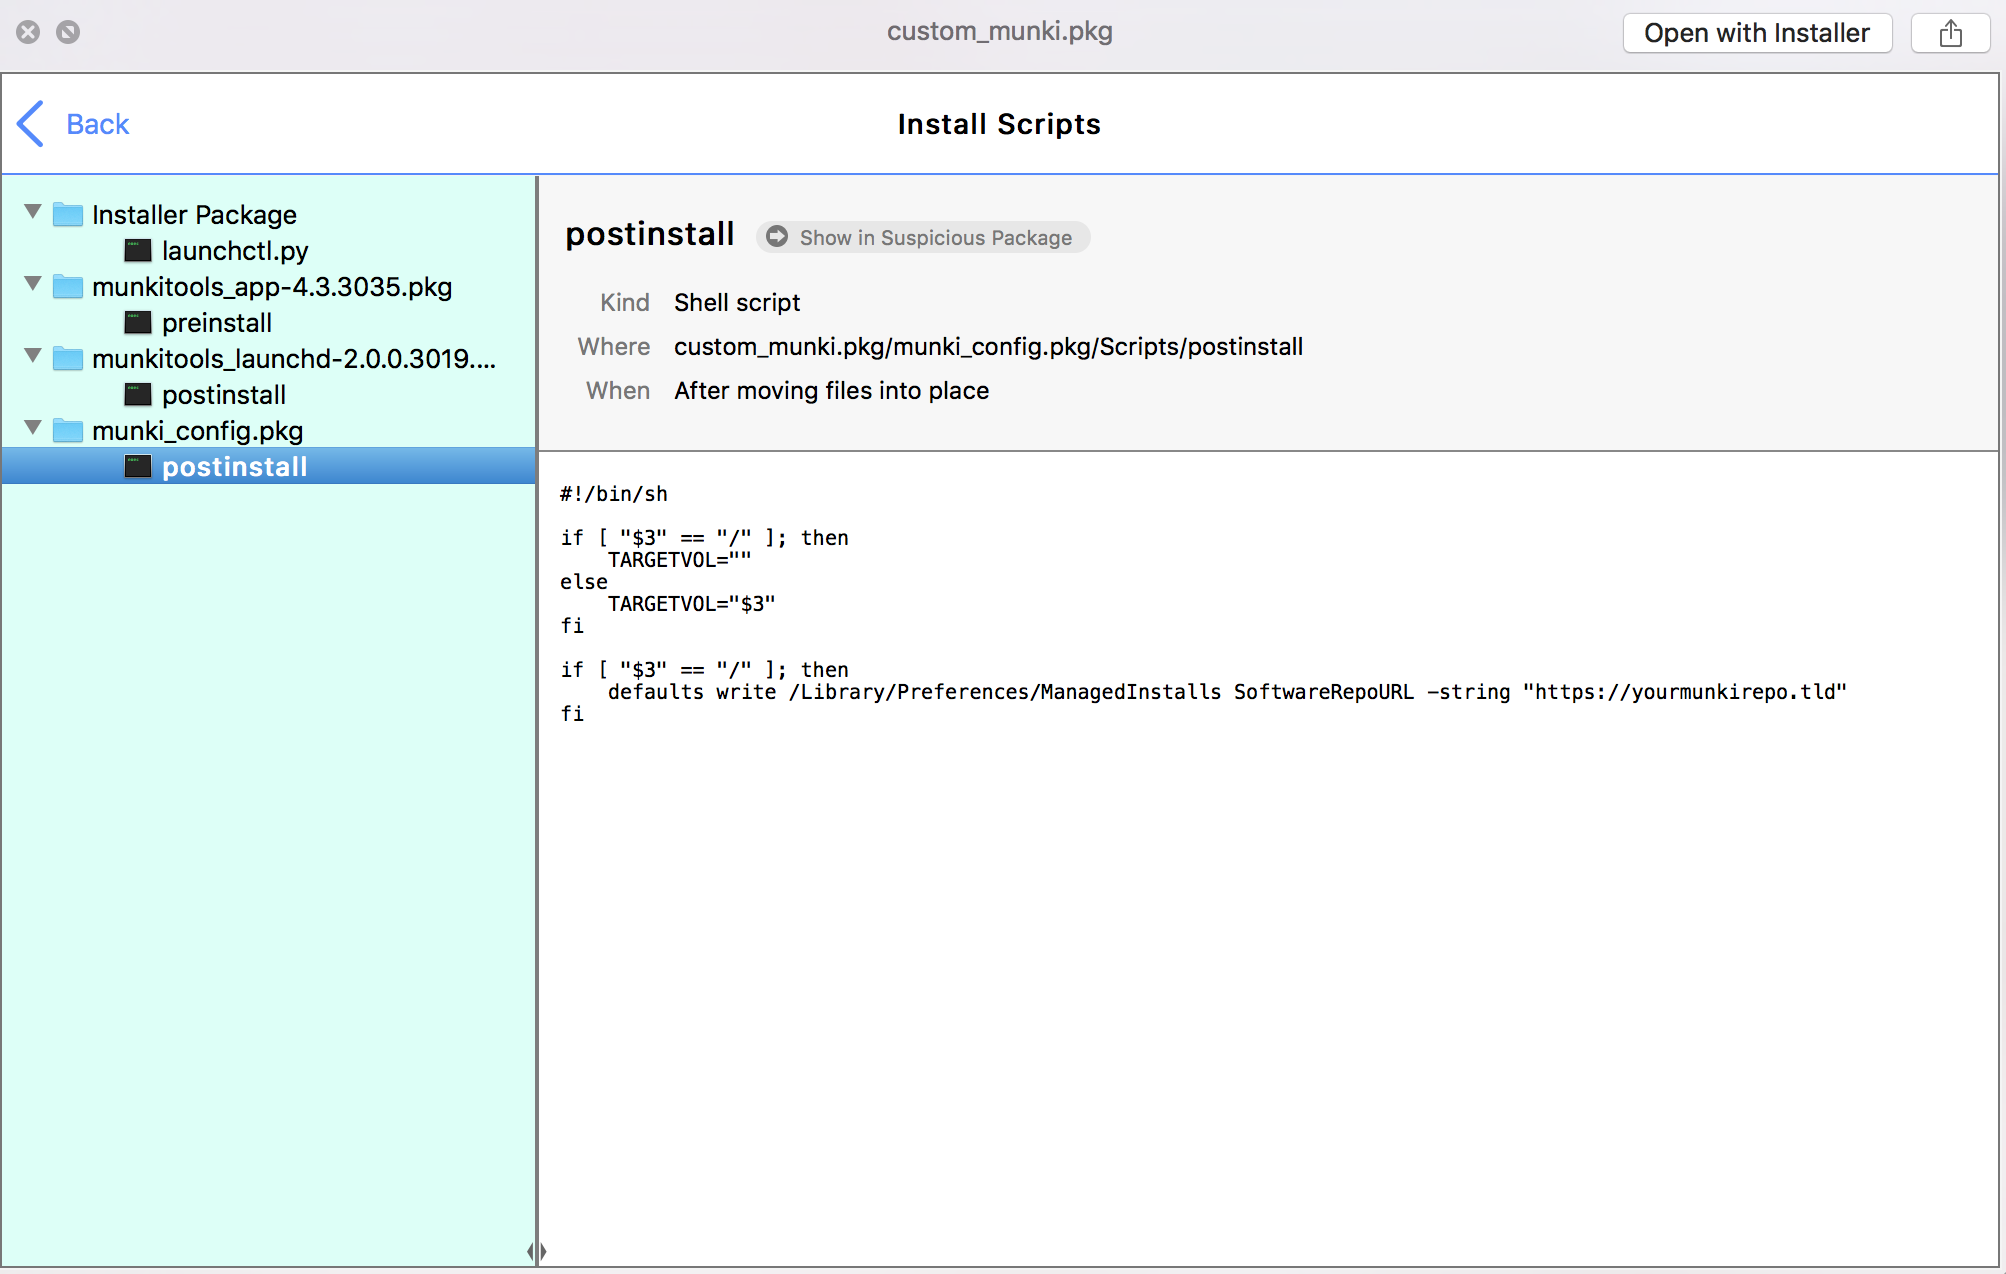
- Create your postinstall script. Save this file as
postinstallin./munki-pkg/munki_config/scripts. This example will configure the SoftwareRepoURL for munki. Adapt as needed.
#!/bin/sh

if [ "$3" == "/" ]; then
    TARGETVOL=""
else
    TARGETVOL="$3"
fi

if [ "$3" == "/" ]; then
    defaults write /Library/Preferences/ManagedInstalls SoftwareRepoURL -string "https://yourmunkirepo.tld"
fi
Now simply create your munki_config package using the munkipkg binary.
./munki-pkg/munkipkg ./munki-pkg/munki_config
If done correctly, you should see something like this:
Creating a new, signed distribution package - Part 1
- Move your newly created configuration package to the location of the other extracted packages
cp ./munki-pkg/munki_config/build/munki_config.pkg ./munkiextracted- If done correctly, you should see something like this in your munkiextracted folder:
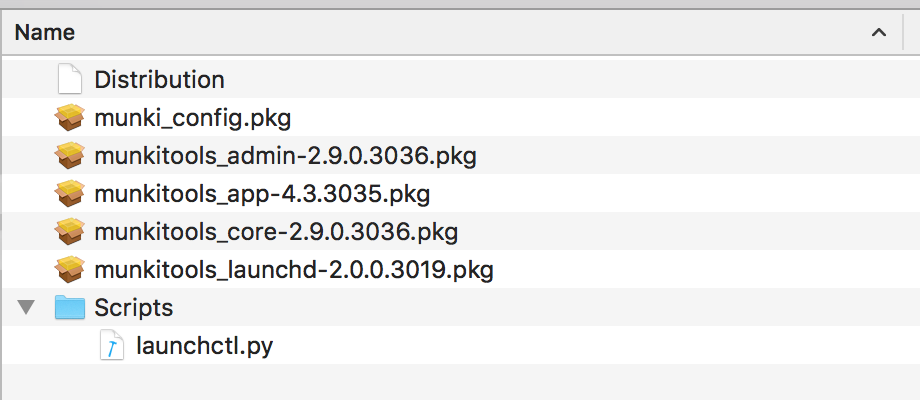
- Using productbuild, specify the paths to your packages and create a new distribution file
productbuild --synthesize \ --package ./munkiextracted/munkitools_admin-2.9.0.3036.pkg \ --package ./munkiextracted/munkitools_app-4.3.3035.pkg \ --package ./munkiextracted/munkitools_core-2.9.0.3036.pkg \ --package ./munkiextracted/munkitools_launchd-2.0.0.3019.pkg \ --package ./munkiextracted/munki_config.pkg \ ./munkiextracted/Distribution_custom.plist- Pay close attention here, as your packages will be installed in the order that you specify.
-
Using your text editor of choice (Atom, TextWrangler, vi, nano), open both
DistributionandDistribution_custom.plist - On line 8 of
Distribution_custom.plist, replace it with the following from theDistributionfile and save.
<options customize="allow" allow-external-scripts="yes"/>
<domains enable_anywhere="true"/>
<installation-check script="requirerestart()"/>
<script>
function requirerestart() {
if (!(system.run('launchctl.py') == 1)) {
// == true is equal to return code 0. Therefore if your script returns 0 (aka true)
// return true to select all of the options or false to deselect.
return "None";
}
return "RequireRestart";
}
</script>
- You can find an example of the entire distribution_custom.plist here
Still with me?
I hope so. Let’s quickly recap what we are doing here.
launchctl.py is a python script I wrote to detect in what context munki is being installed. Starting with macOS 10.7 and higher, you can have an external script perform an installation-check. Since munki will be downloaded/installed prior to the user session, we want to ensure the package doesn’t require a reboot. So long as the package is installed prior to the user session, this will work perfectly.
The distribution plist is the “brains” behind the package itself. It tells the package what to install and in what order. Remember, when creating a custom package, the order matters. If you are attempting to do something clever, but your package order is incorrect, it won’t work.
Also, the new munkitools launchd package has a postinstall that will also detect if it’s being installed prior to the user session and will load the daemons.
Something to point out here, depending on your MDM, the package could install after the user session. You may want to test this and see how the package behaves. Think of both the postinstall and launchctl.py as a “best effort”.
Back to it…
Creating a new, signed distribution package - Part 2
- Go to the
./munkiextracteddirectorycd ./munkiextracted
- Create your new package with productbuild
/usr/bin/productbuild \ --distribution ./Distribution_custom.plist \ --resources . \ --scripts ./Scripts \ --sign "Developer ID Installer: Example (R9UM25C6B5)" \ ./custom_munki.pkg- If successful, terminal will output
productbuild: Wrote product to ./custom_munki.pkg
- If successful, terminal will output
You can check the contents of your new package with Suspicious Package. If done correctly, you will see launchtl.py, pre/postinstalls for the standard munkipkgs and your custom pkg with a postinstall.
That’s it!
And with that, you are ready to go forth and deploy either a standard munki configuration or a custom package tailored to your company.